
Exposure Explained Simply - Aperture, Shutter Speed, ISO
]]
by default it should be 1920 by 1080. But if u shoot in 4K then you may also manually set the size by un checking the box on the right
If you don’t know what is frame rate?
Select all frame (control/command+A) right click and select “new sequence from clip”
or go to file-import
You can drag your file here
Premiere Pro
tutorial
How to reserve KI facility
tutorial
Replacement Animation
tutorial
Davinci Resolve
Tutorial for editing animation tutorial

Camera for Stopmtion
tutorial
Dragonframe Tips
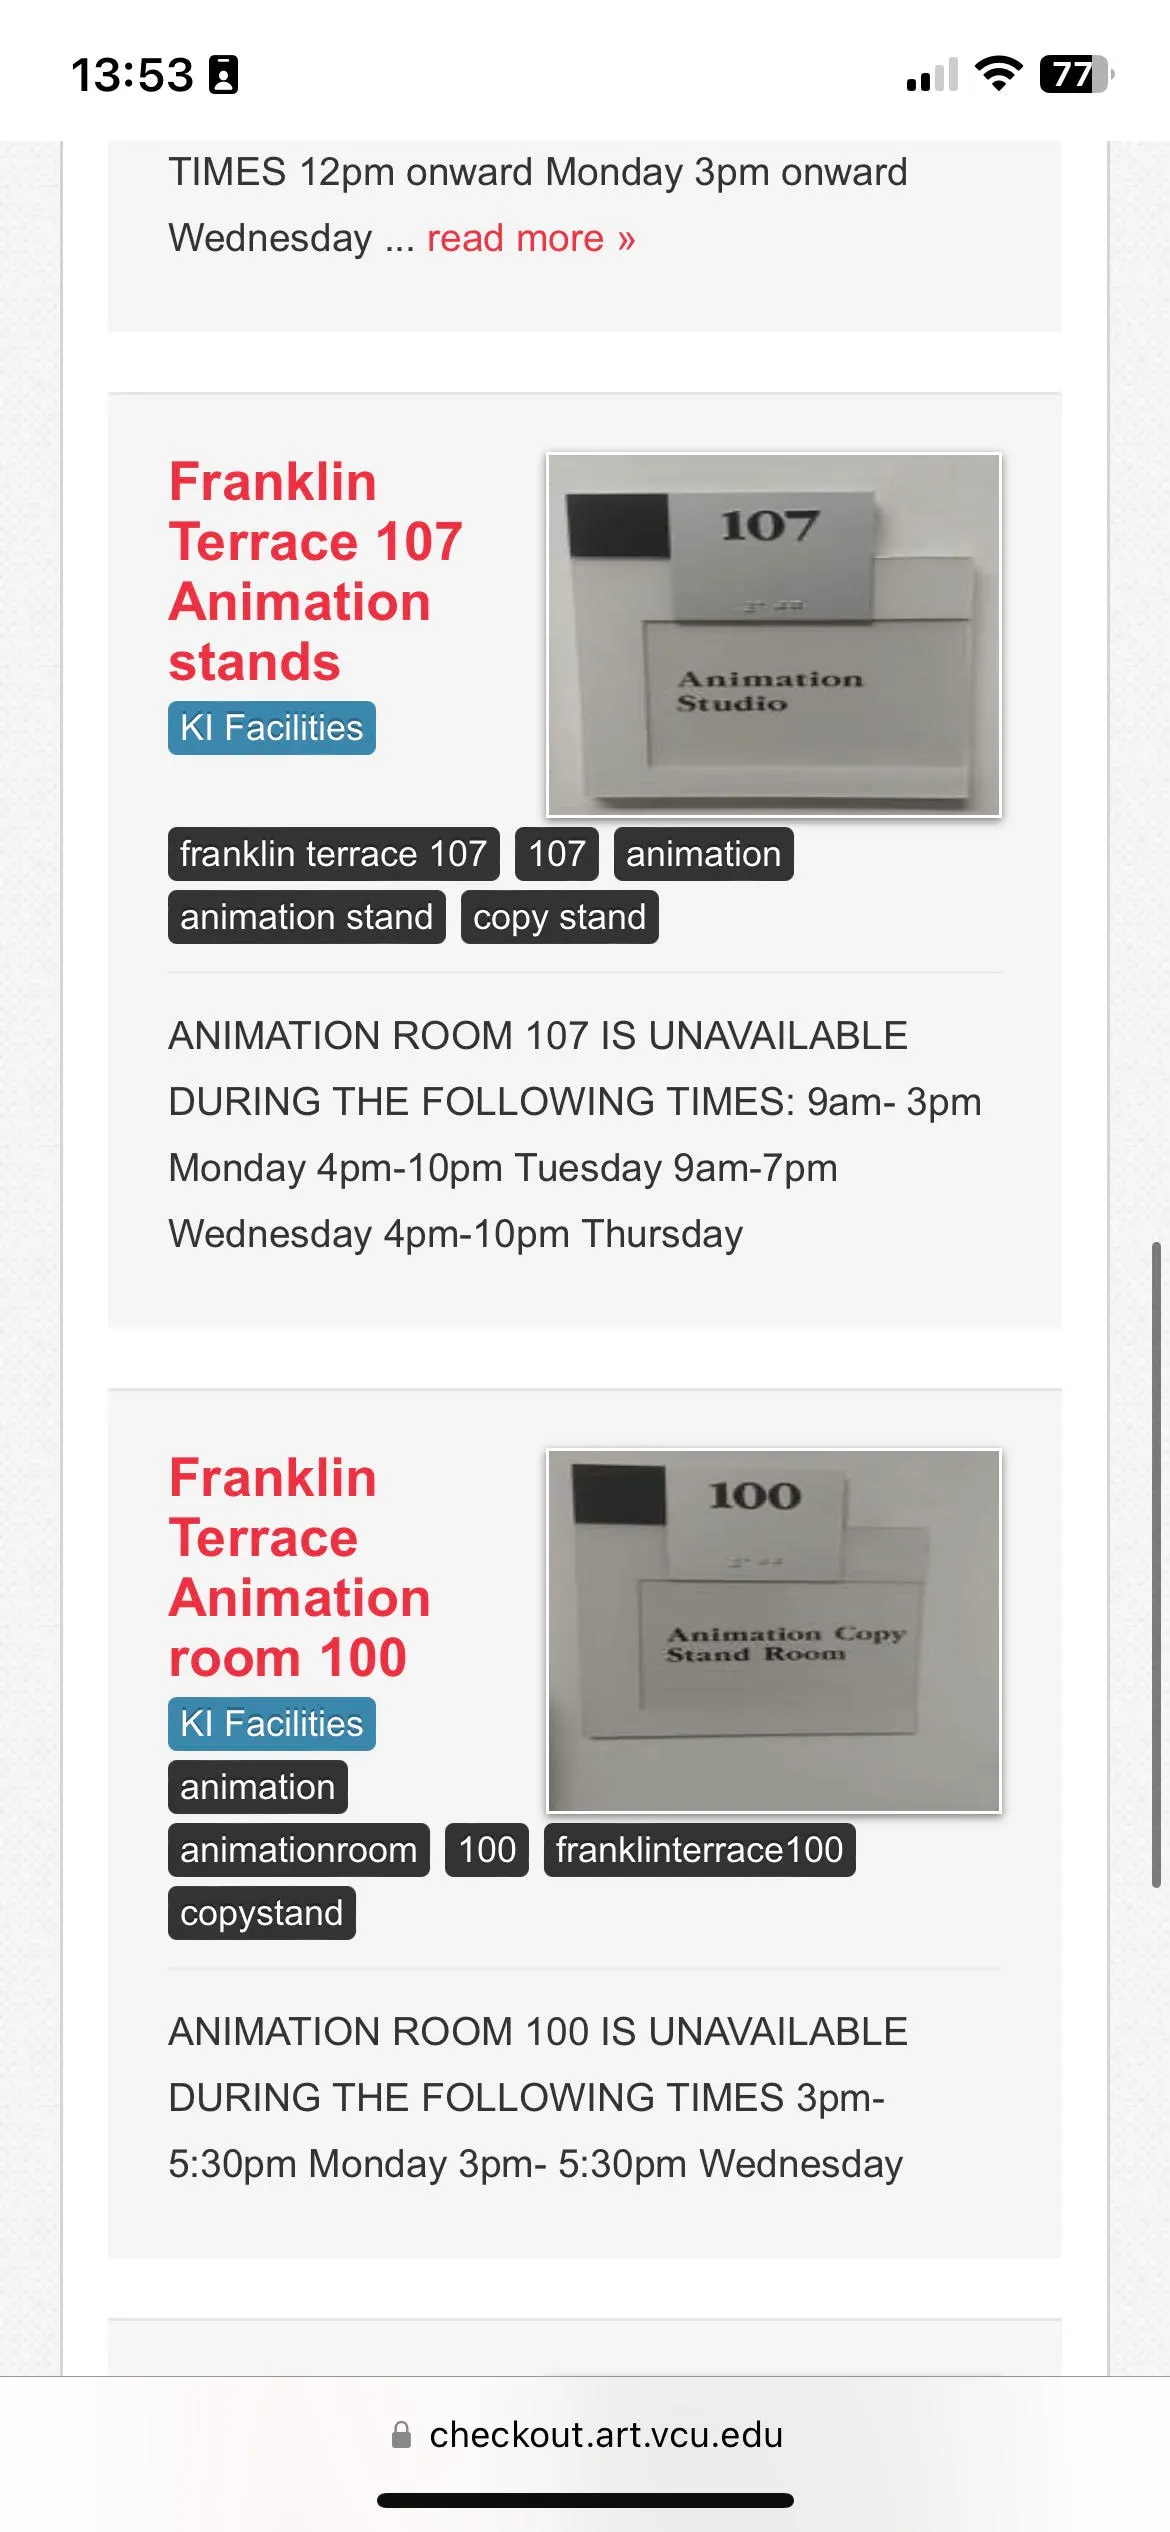
4. Reserve the space by selecting the time you want

3. Select “facility”
2. Login with your Eid


Control/Command + A

Go Back
so that your lighting is consistent
you might need to find specific tutorial for the camera you check out
So that you don’t risk touching your camera and making the frame shaky!
AVOID Florescent light! they flicker (Unless you want it)
3. Use Shutter release or use a timer!
5. Keep in mind the dynamo rhythm!
4. Find a place that has a stable lighting
(super big sun is good, or cloudy days.)
If you want the movement to be slower, just shoot more frames, and faster means less or frame and bigger movements.
5. Some examples and tutorials of your choice
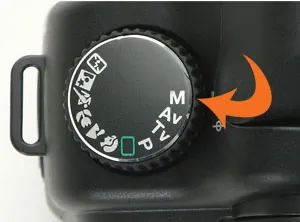
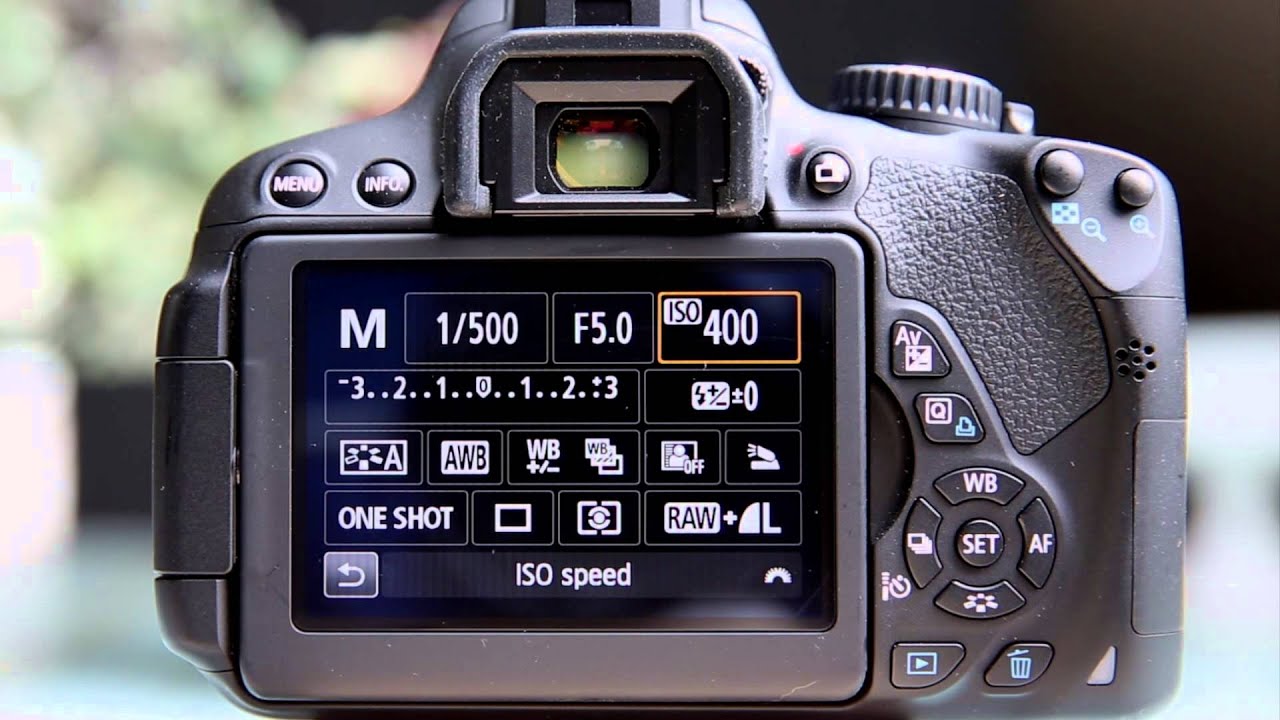
2. Use MANUAL exposure for this
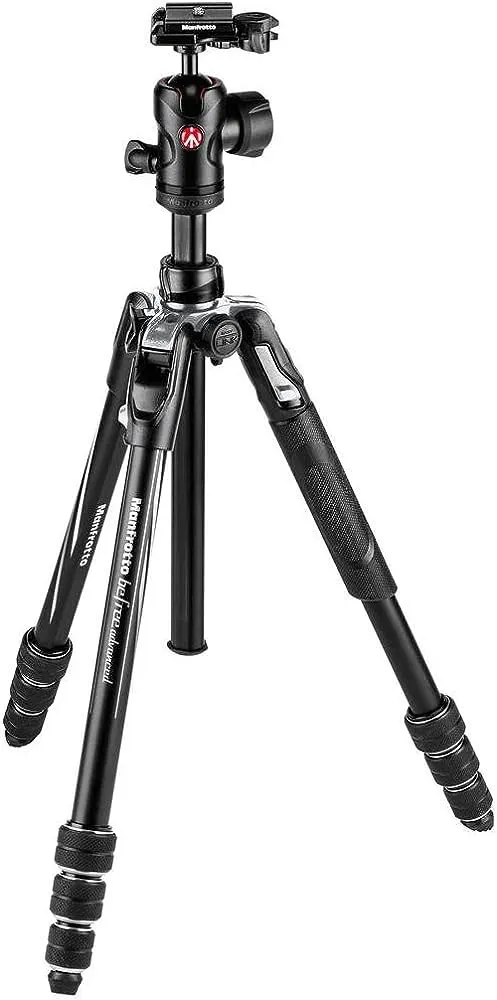
bring a tripod
bring a remote shutter if you can
Bring your SD card!
RECHARGE your battery overnight! Always
If you don’t have you probably can persuade Noren to get one for you this time, but you should buy one soon cuz KI doesn’t check out SD cards. If you are checking out a cameras that use USB to export, then you don’t need that.


1. familiar yourself with the buttons
0 Check list before shooting
You can either send it to media encoder or just use premiere to export it
The format is H264, which is an mp4 format


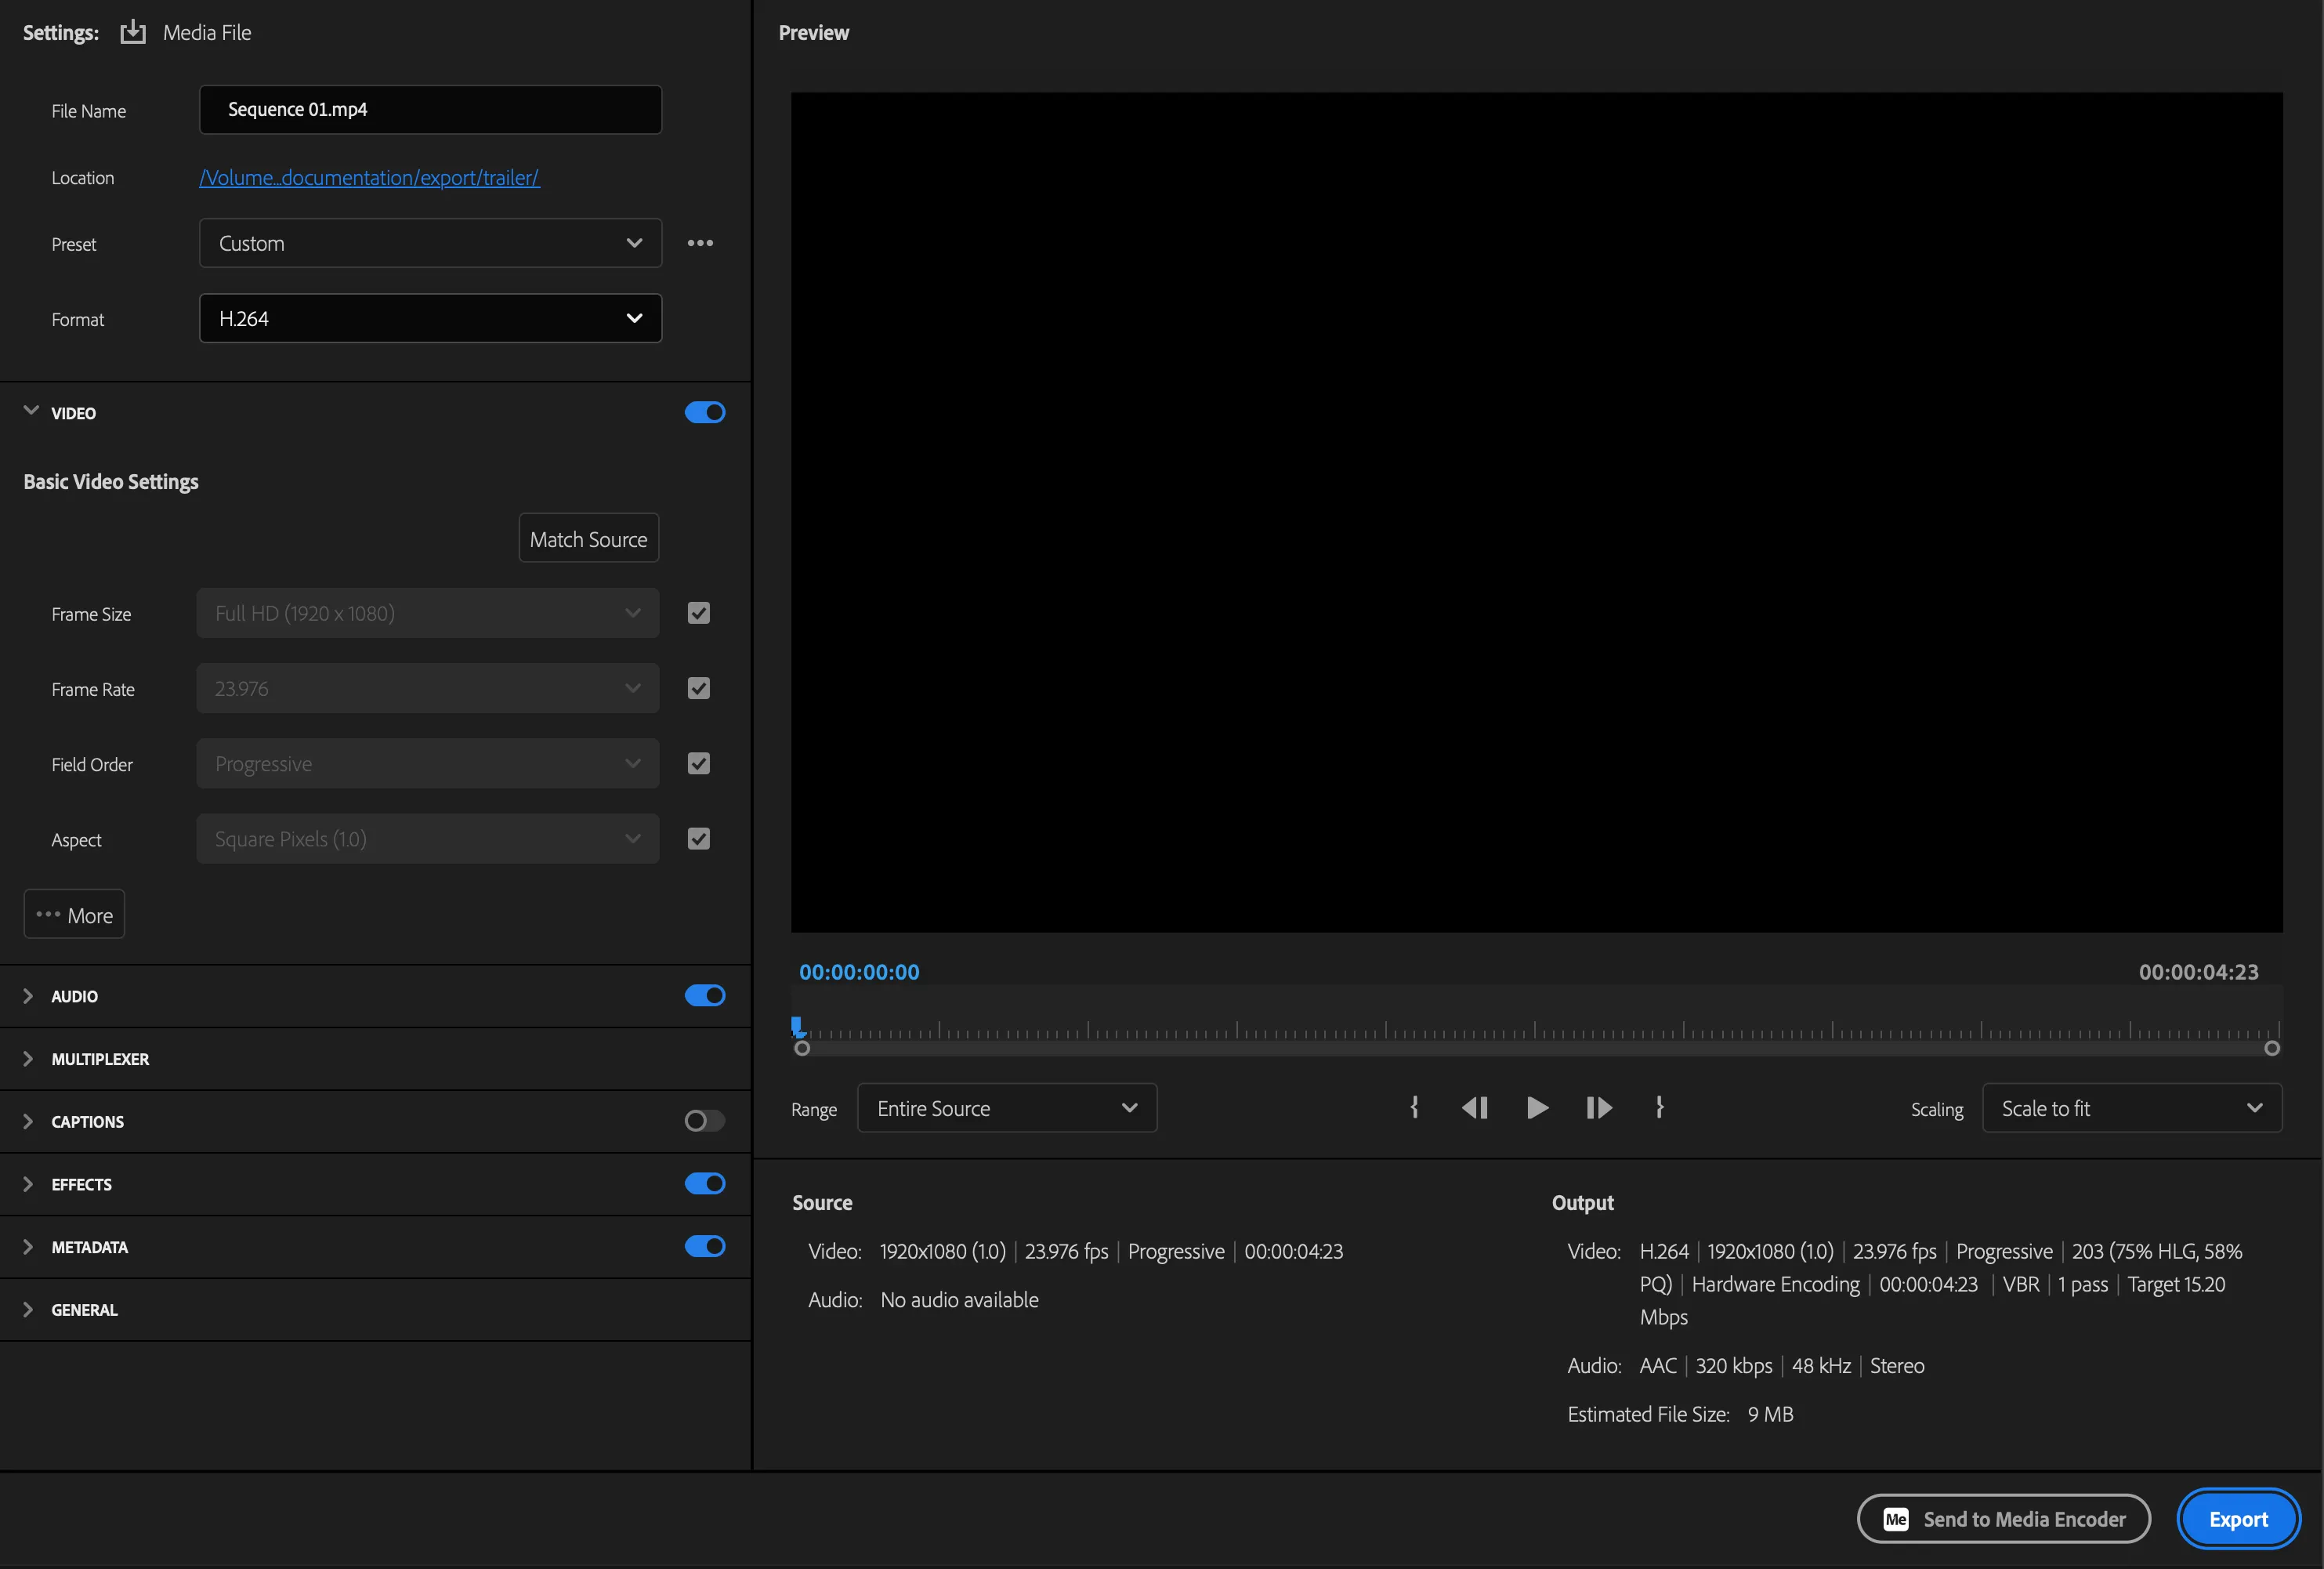
After you r done, choose the “export” button

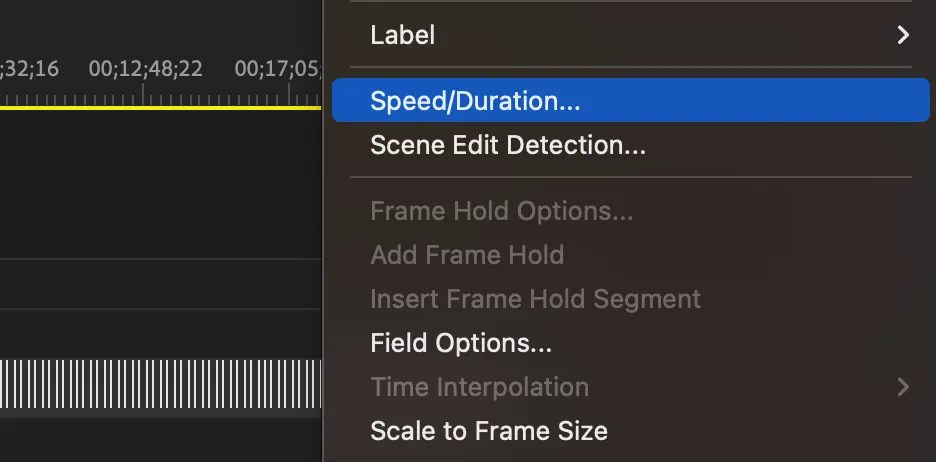
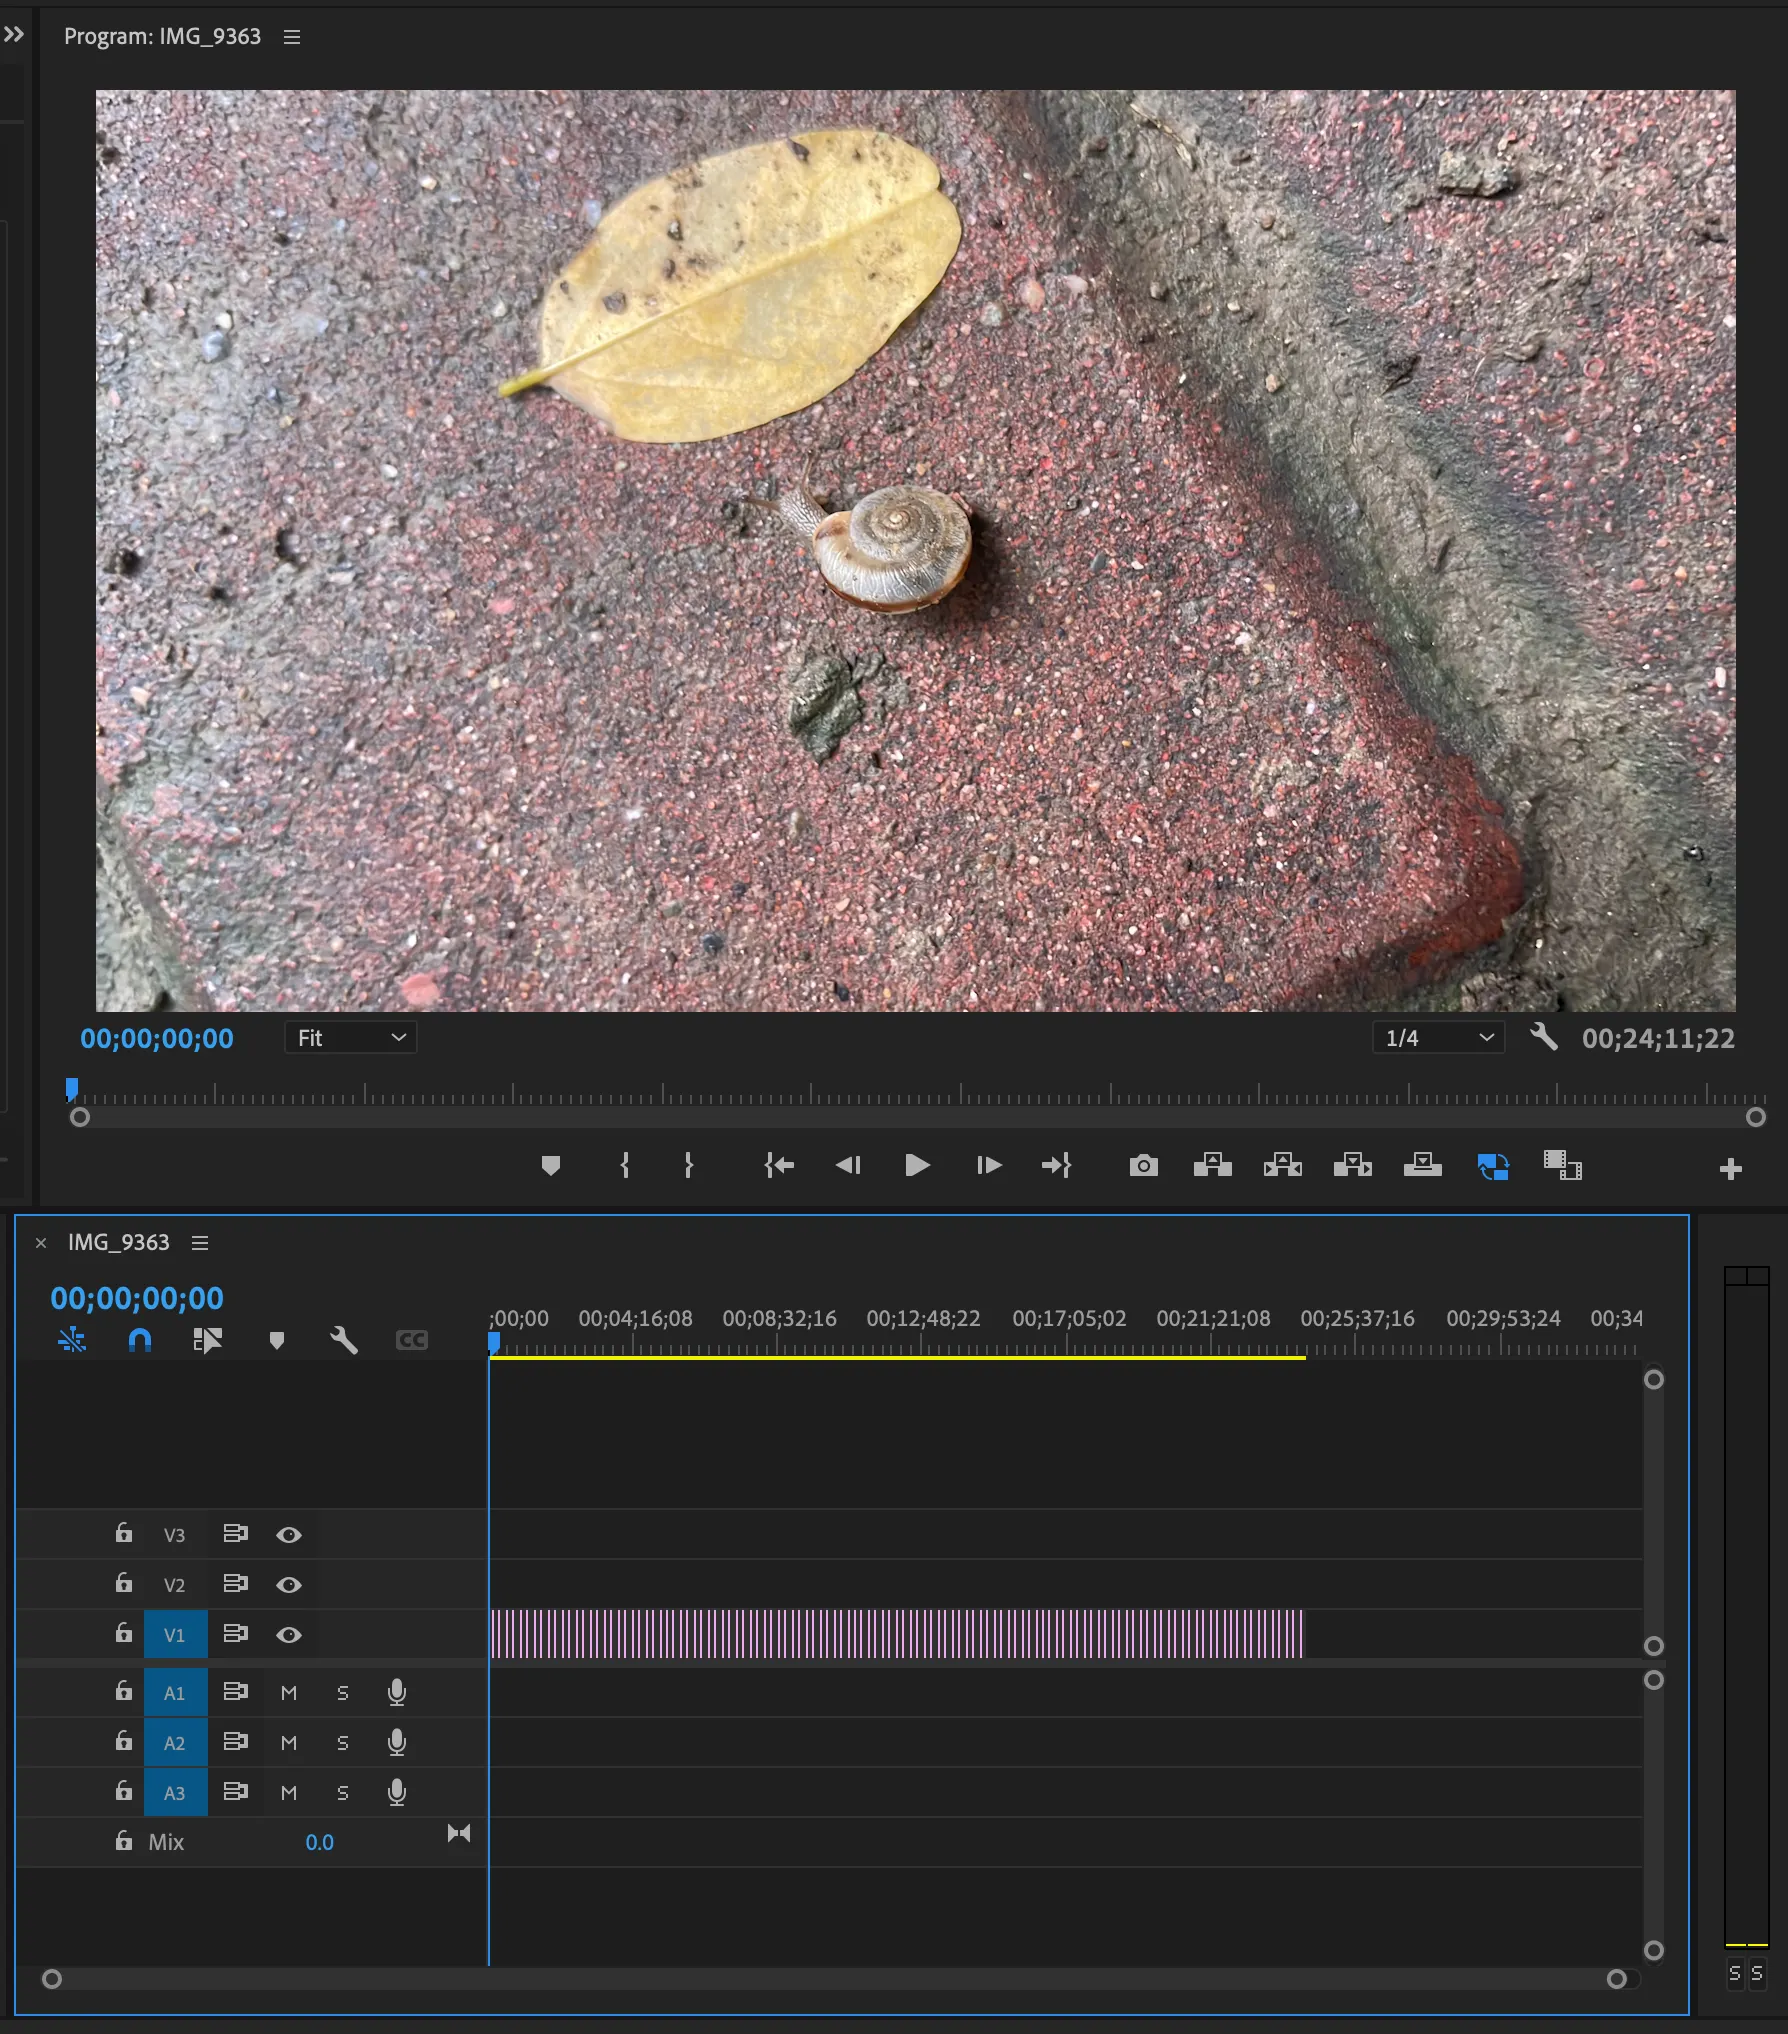
this will actually makes it like 12 frames per second, because each image is holding 2 frames.

change to 2 frame

It will kind of look like this
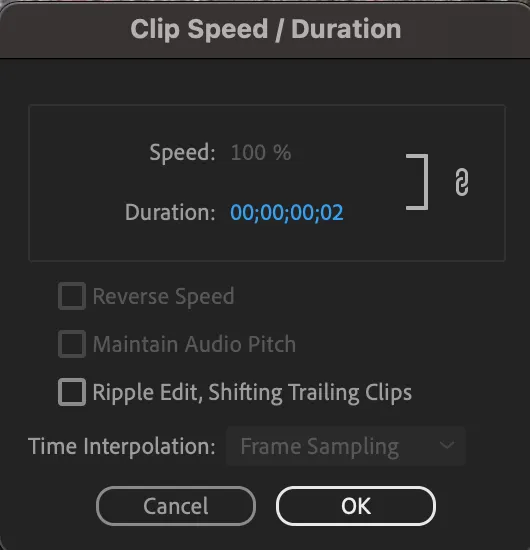
Select all (control/Command+A) right click and select “speed/duration”
3. Export your frame, and U R ready to edit!
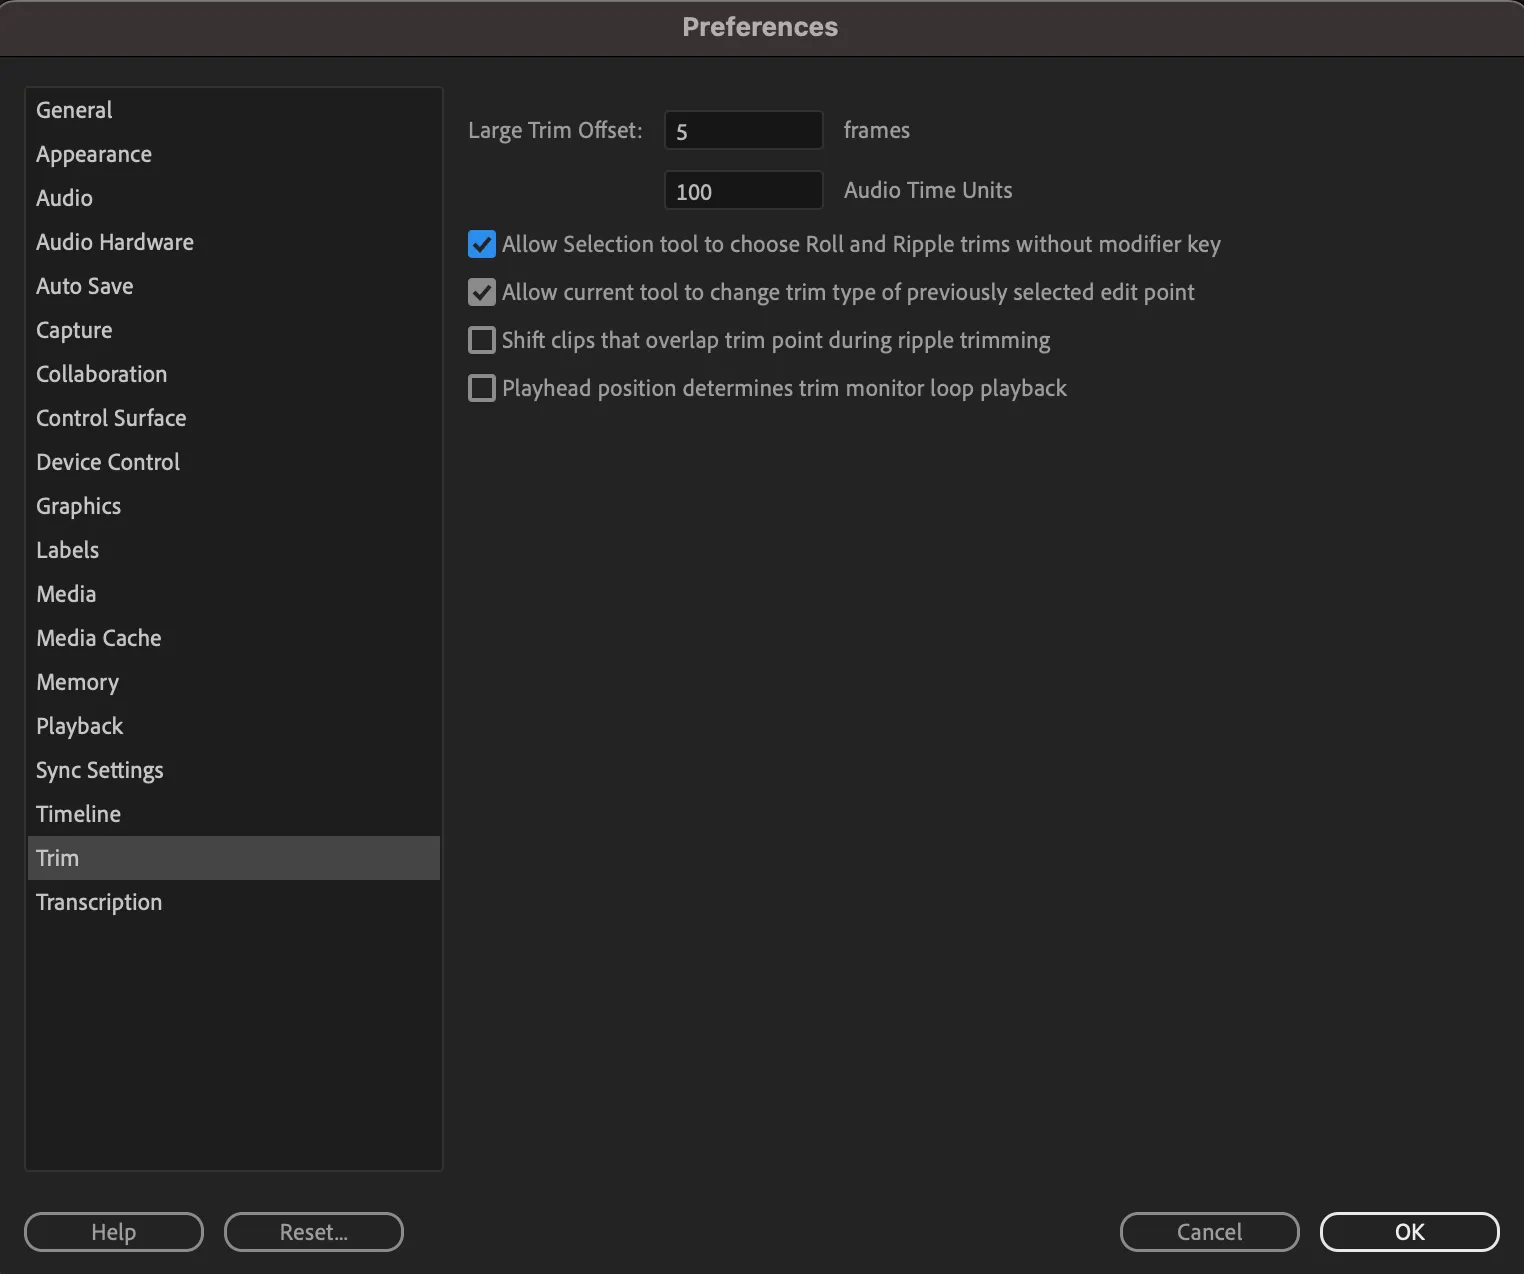
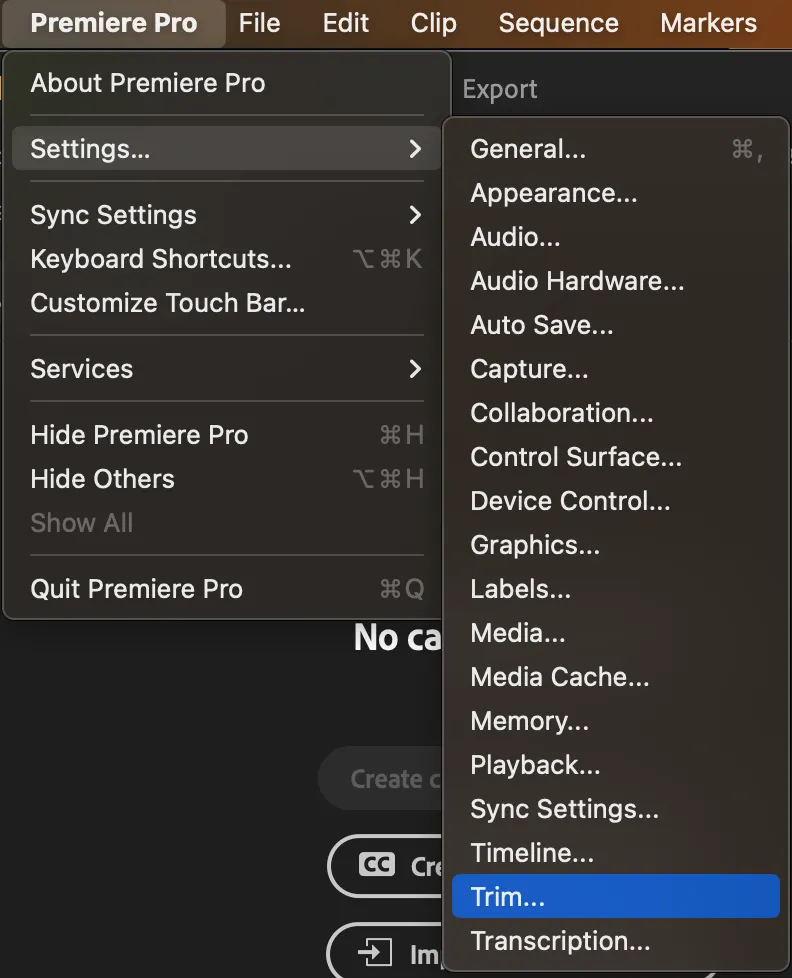
I personally would recommend turn on the “allow selection tool to choose roll and ripple trims without modifier key” option in your trim preference. So that you can stretch your frame and push other frames backward


When you zoom in You will see your images last 2 frame

Go to sequence-close gap
Refer to Tutorial for Stop motion studio
Control/Command + A
Select all (Control/Command +A) Drag them under the empty timeline space, then you will automatically has a new timeline sequence
Import all the frames you get (Control/Command +A, and drag)


2. Align them, Repeat them
there is video here if you don’t see it. please wait till it loads!
Then you can start moving the frames around

select 24 fps

Select sequence setting
timeline
You will see a new clip shows up

Program Monitor


This is where you can drop your assets (frames). It’s called “project panel
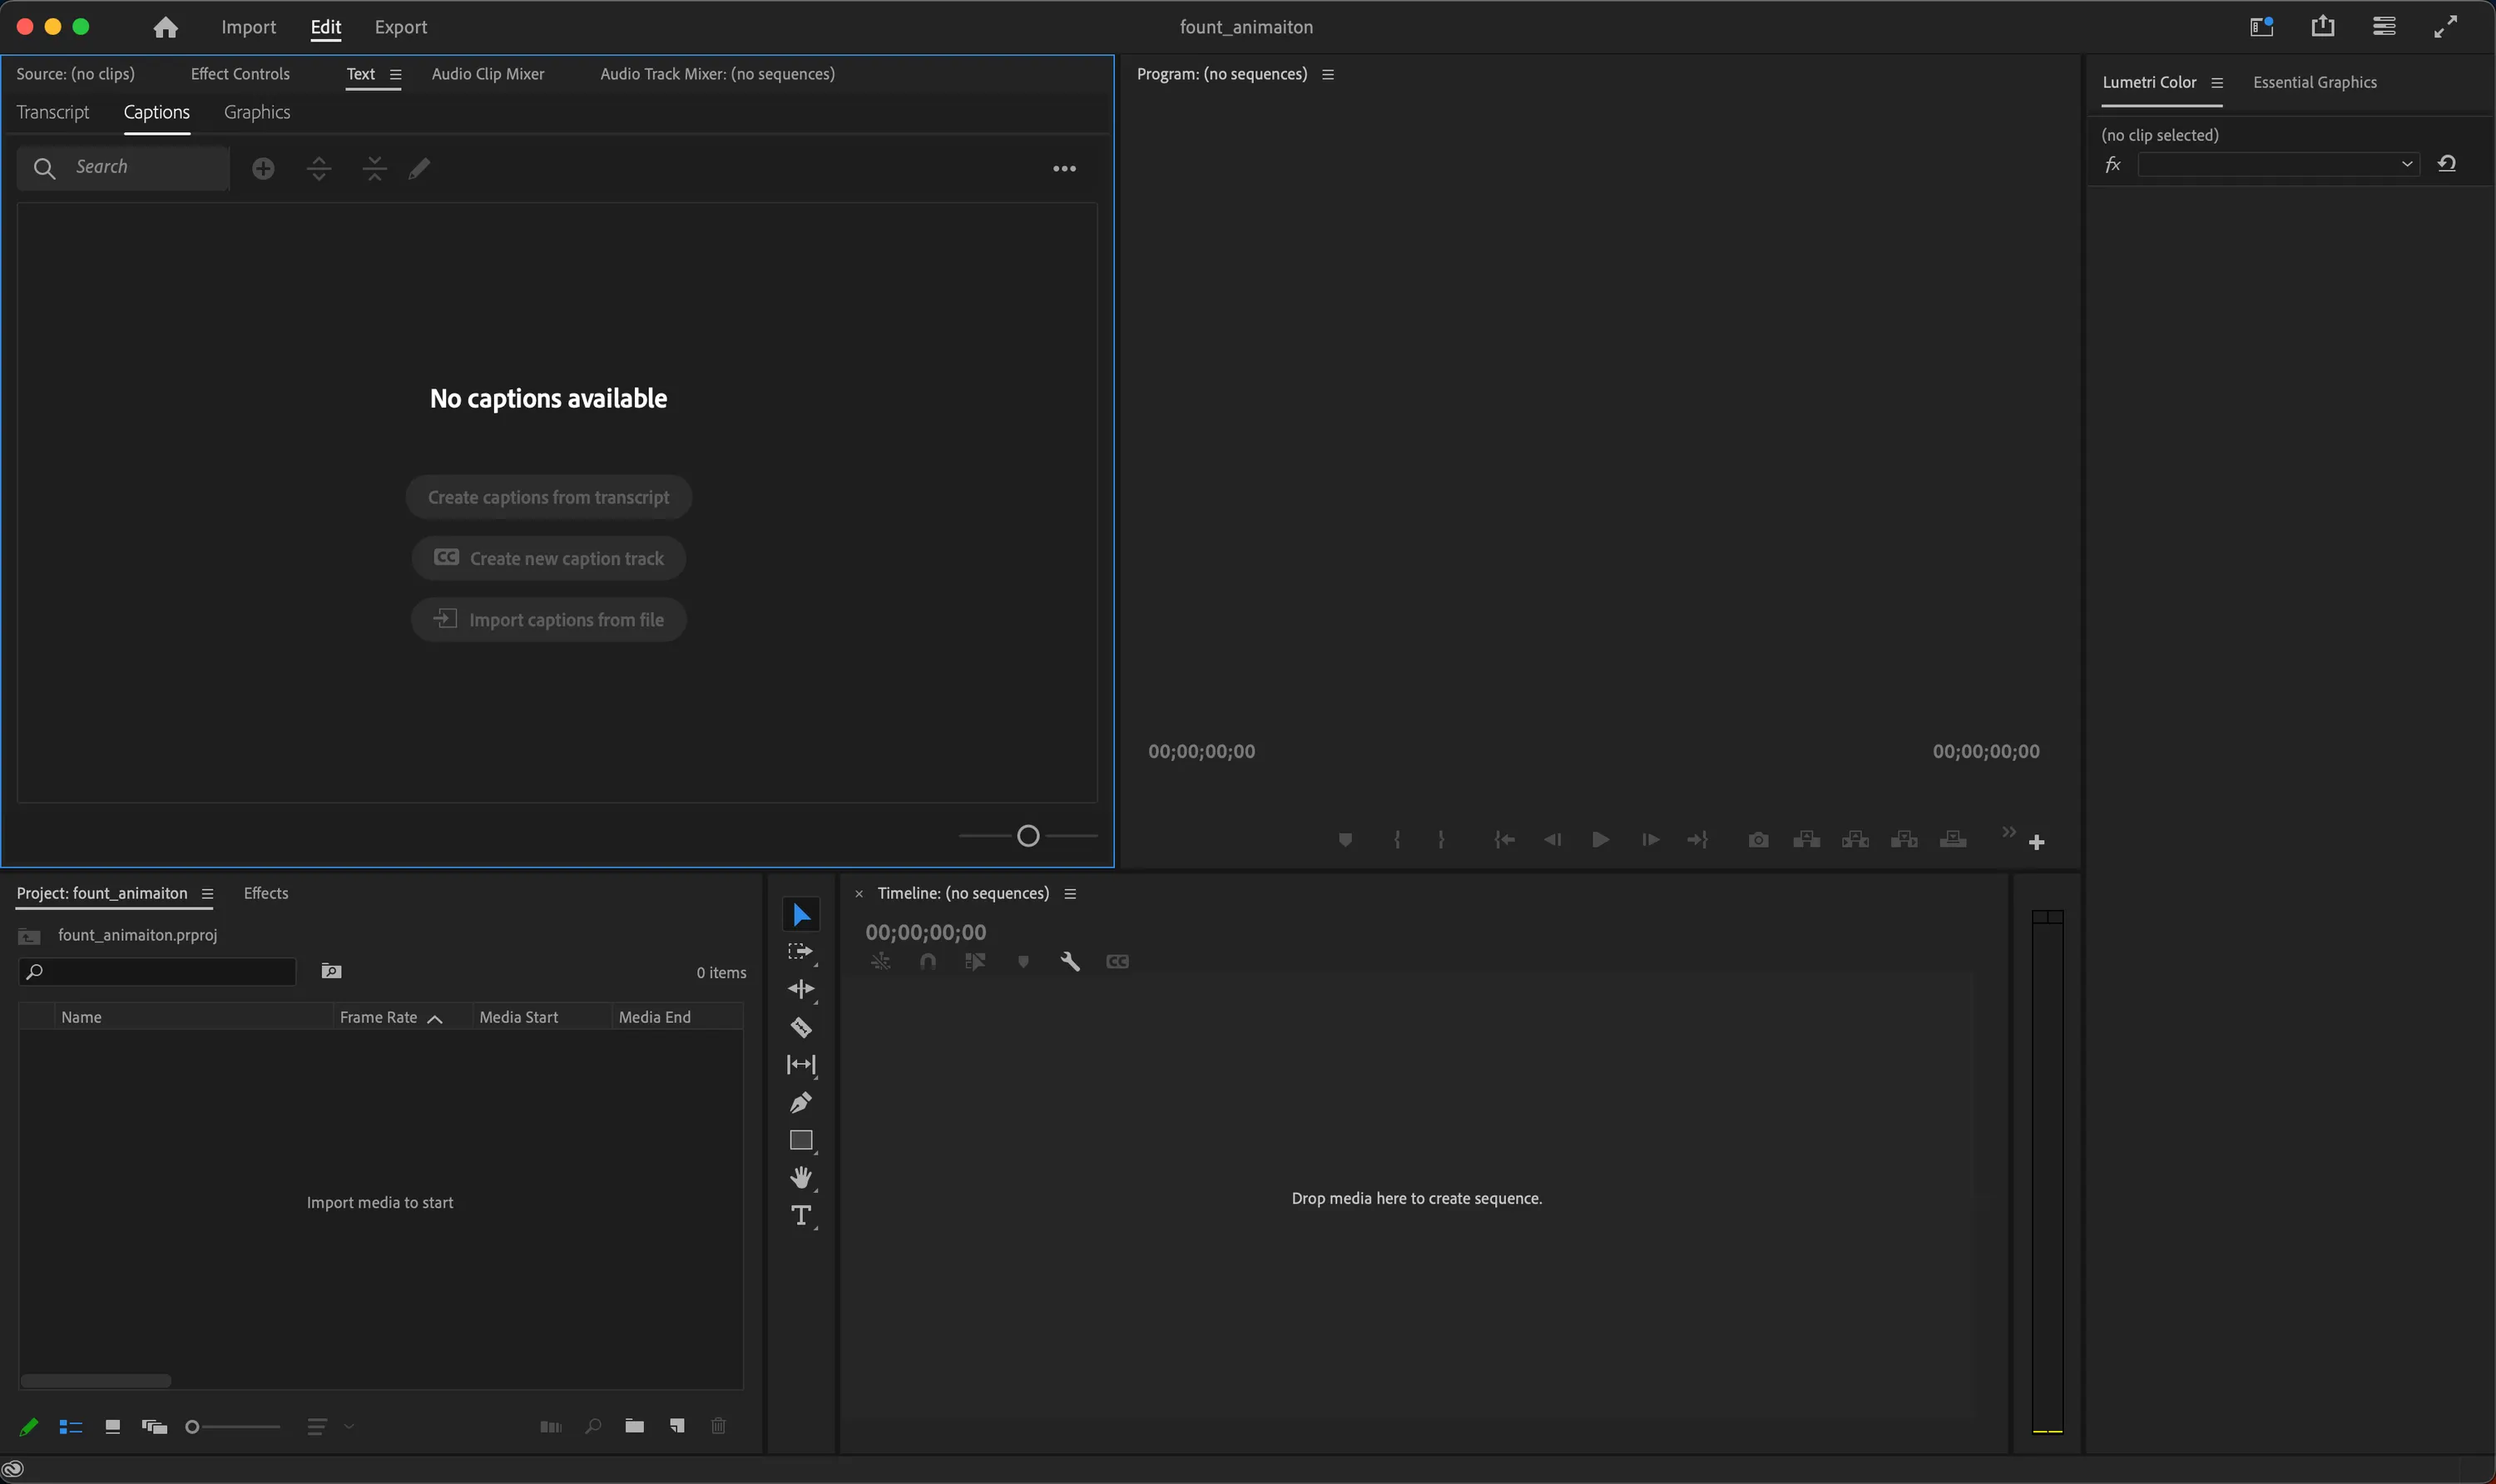
Here is your workspace, might look different from mine

Hit Create

type in whatever project you want to name this
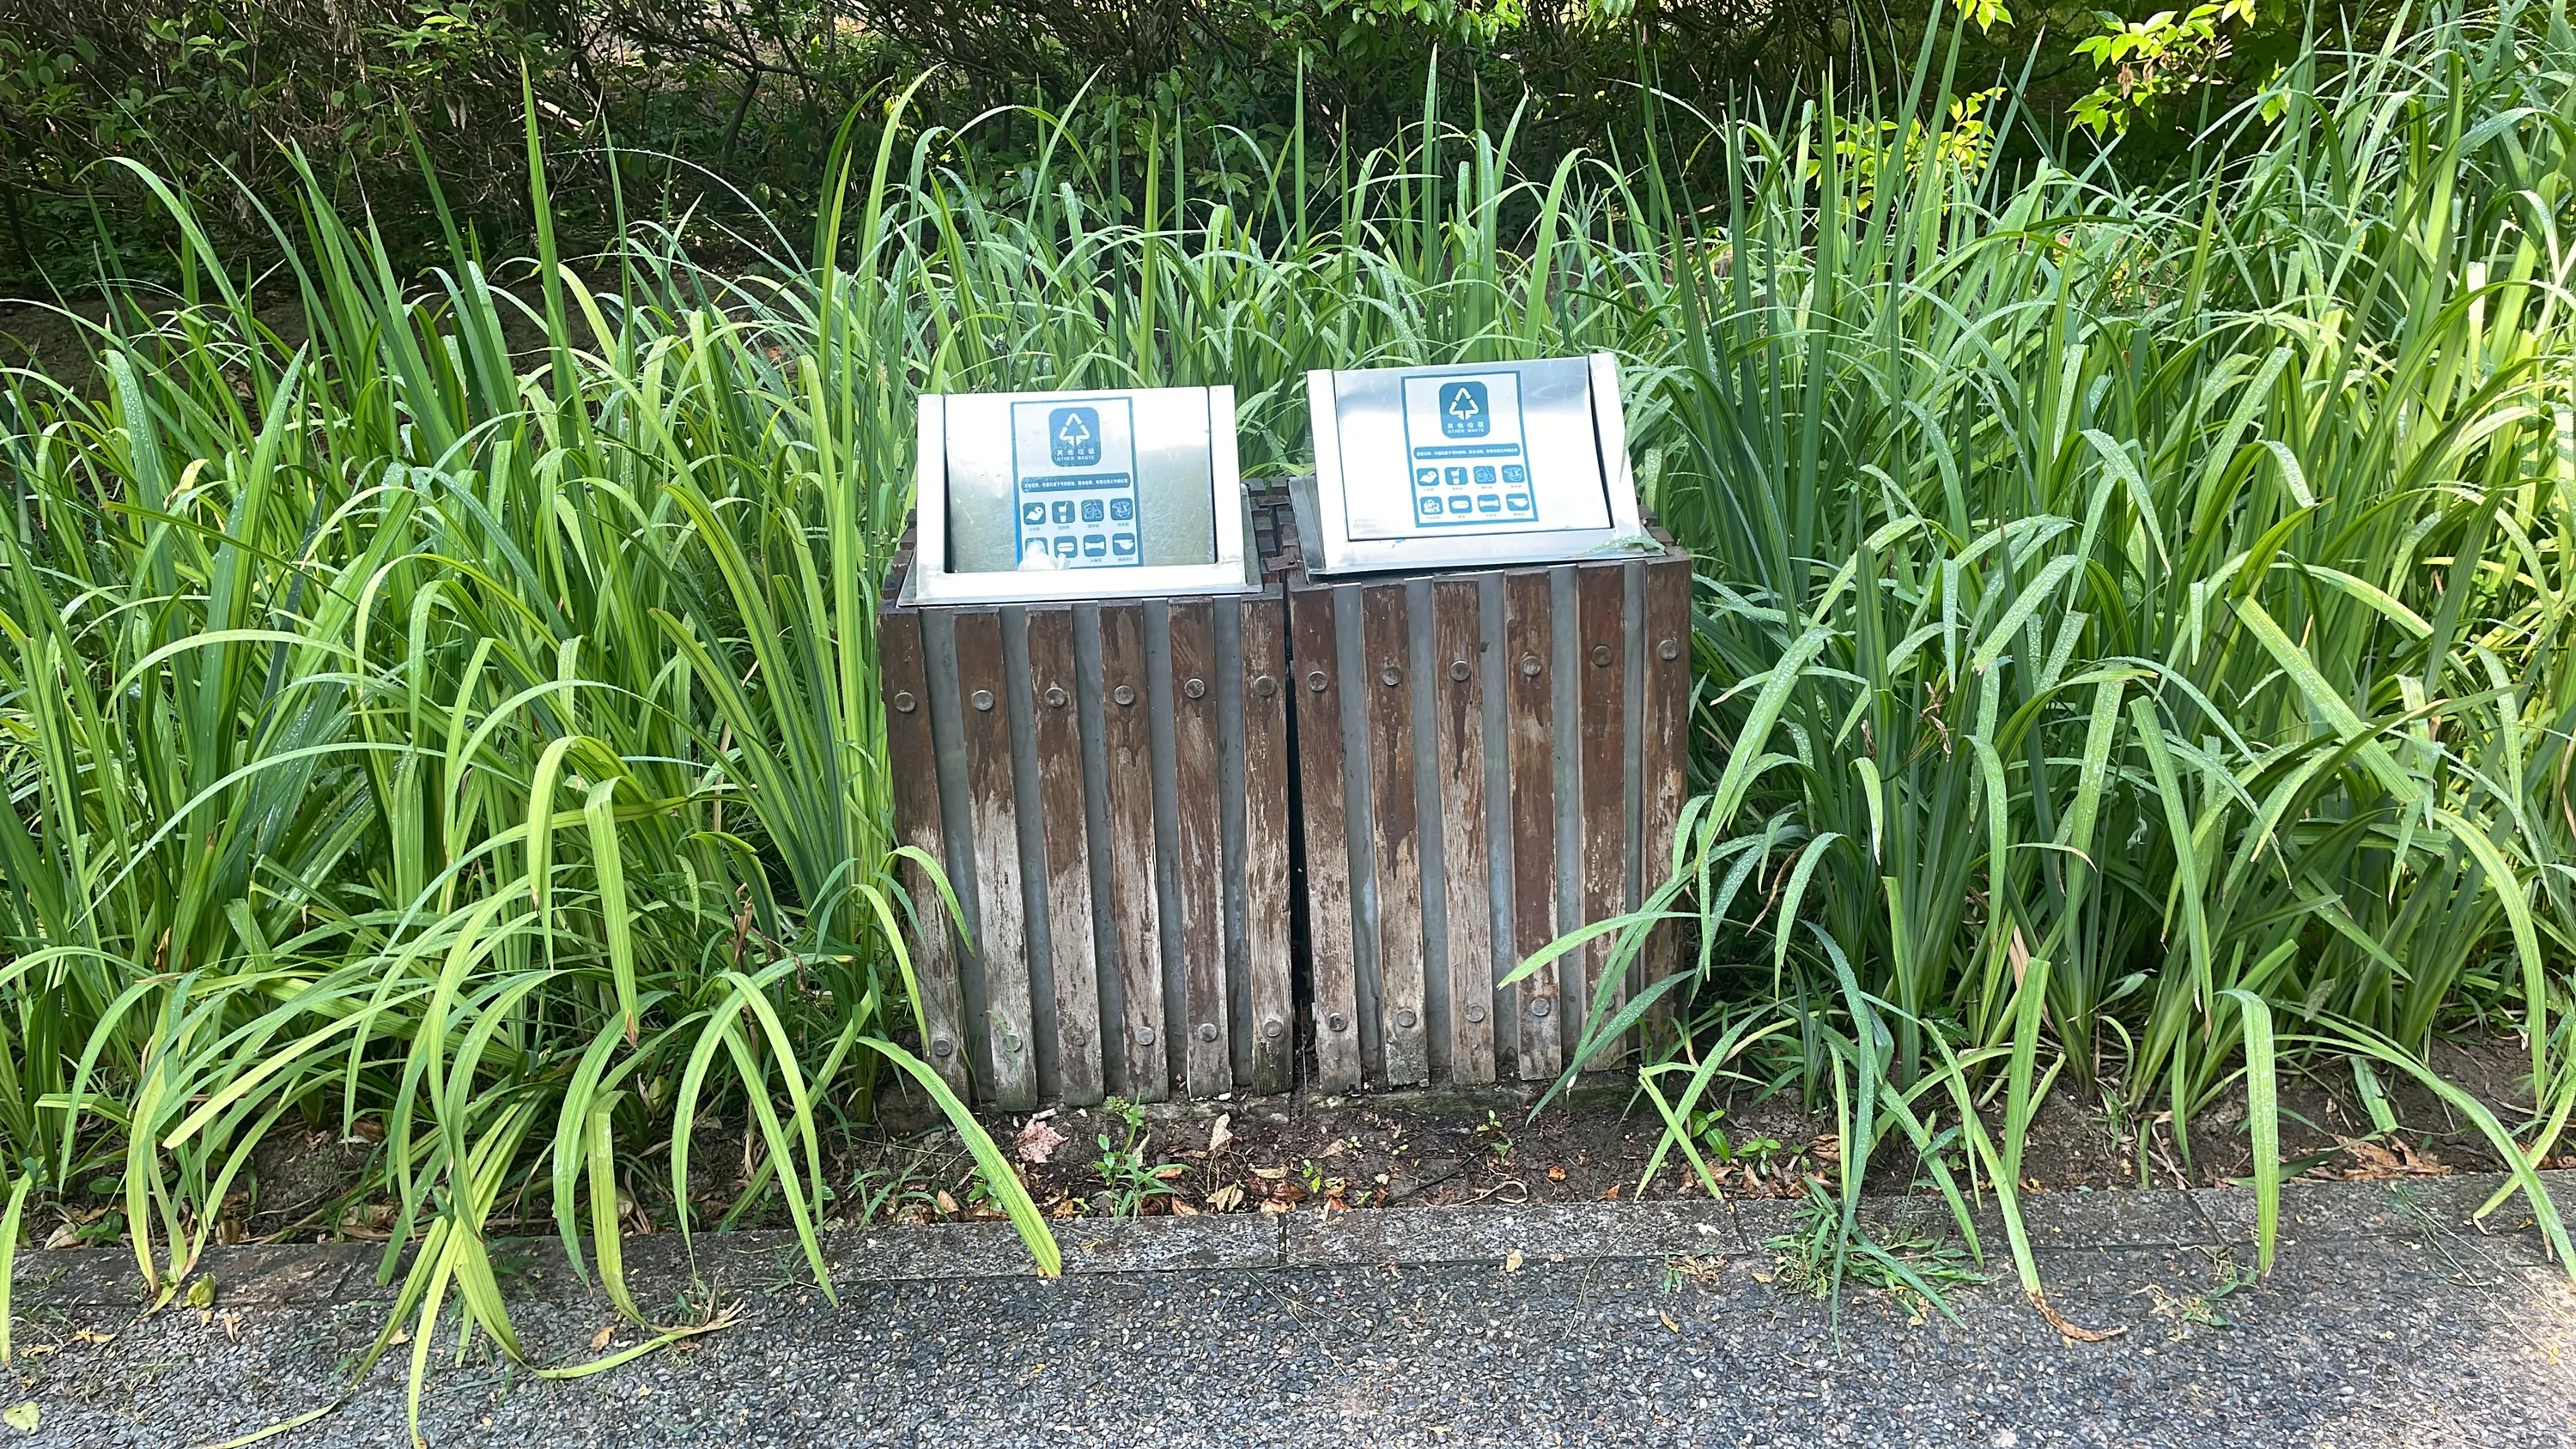
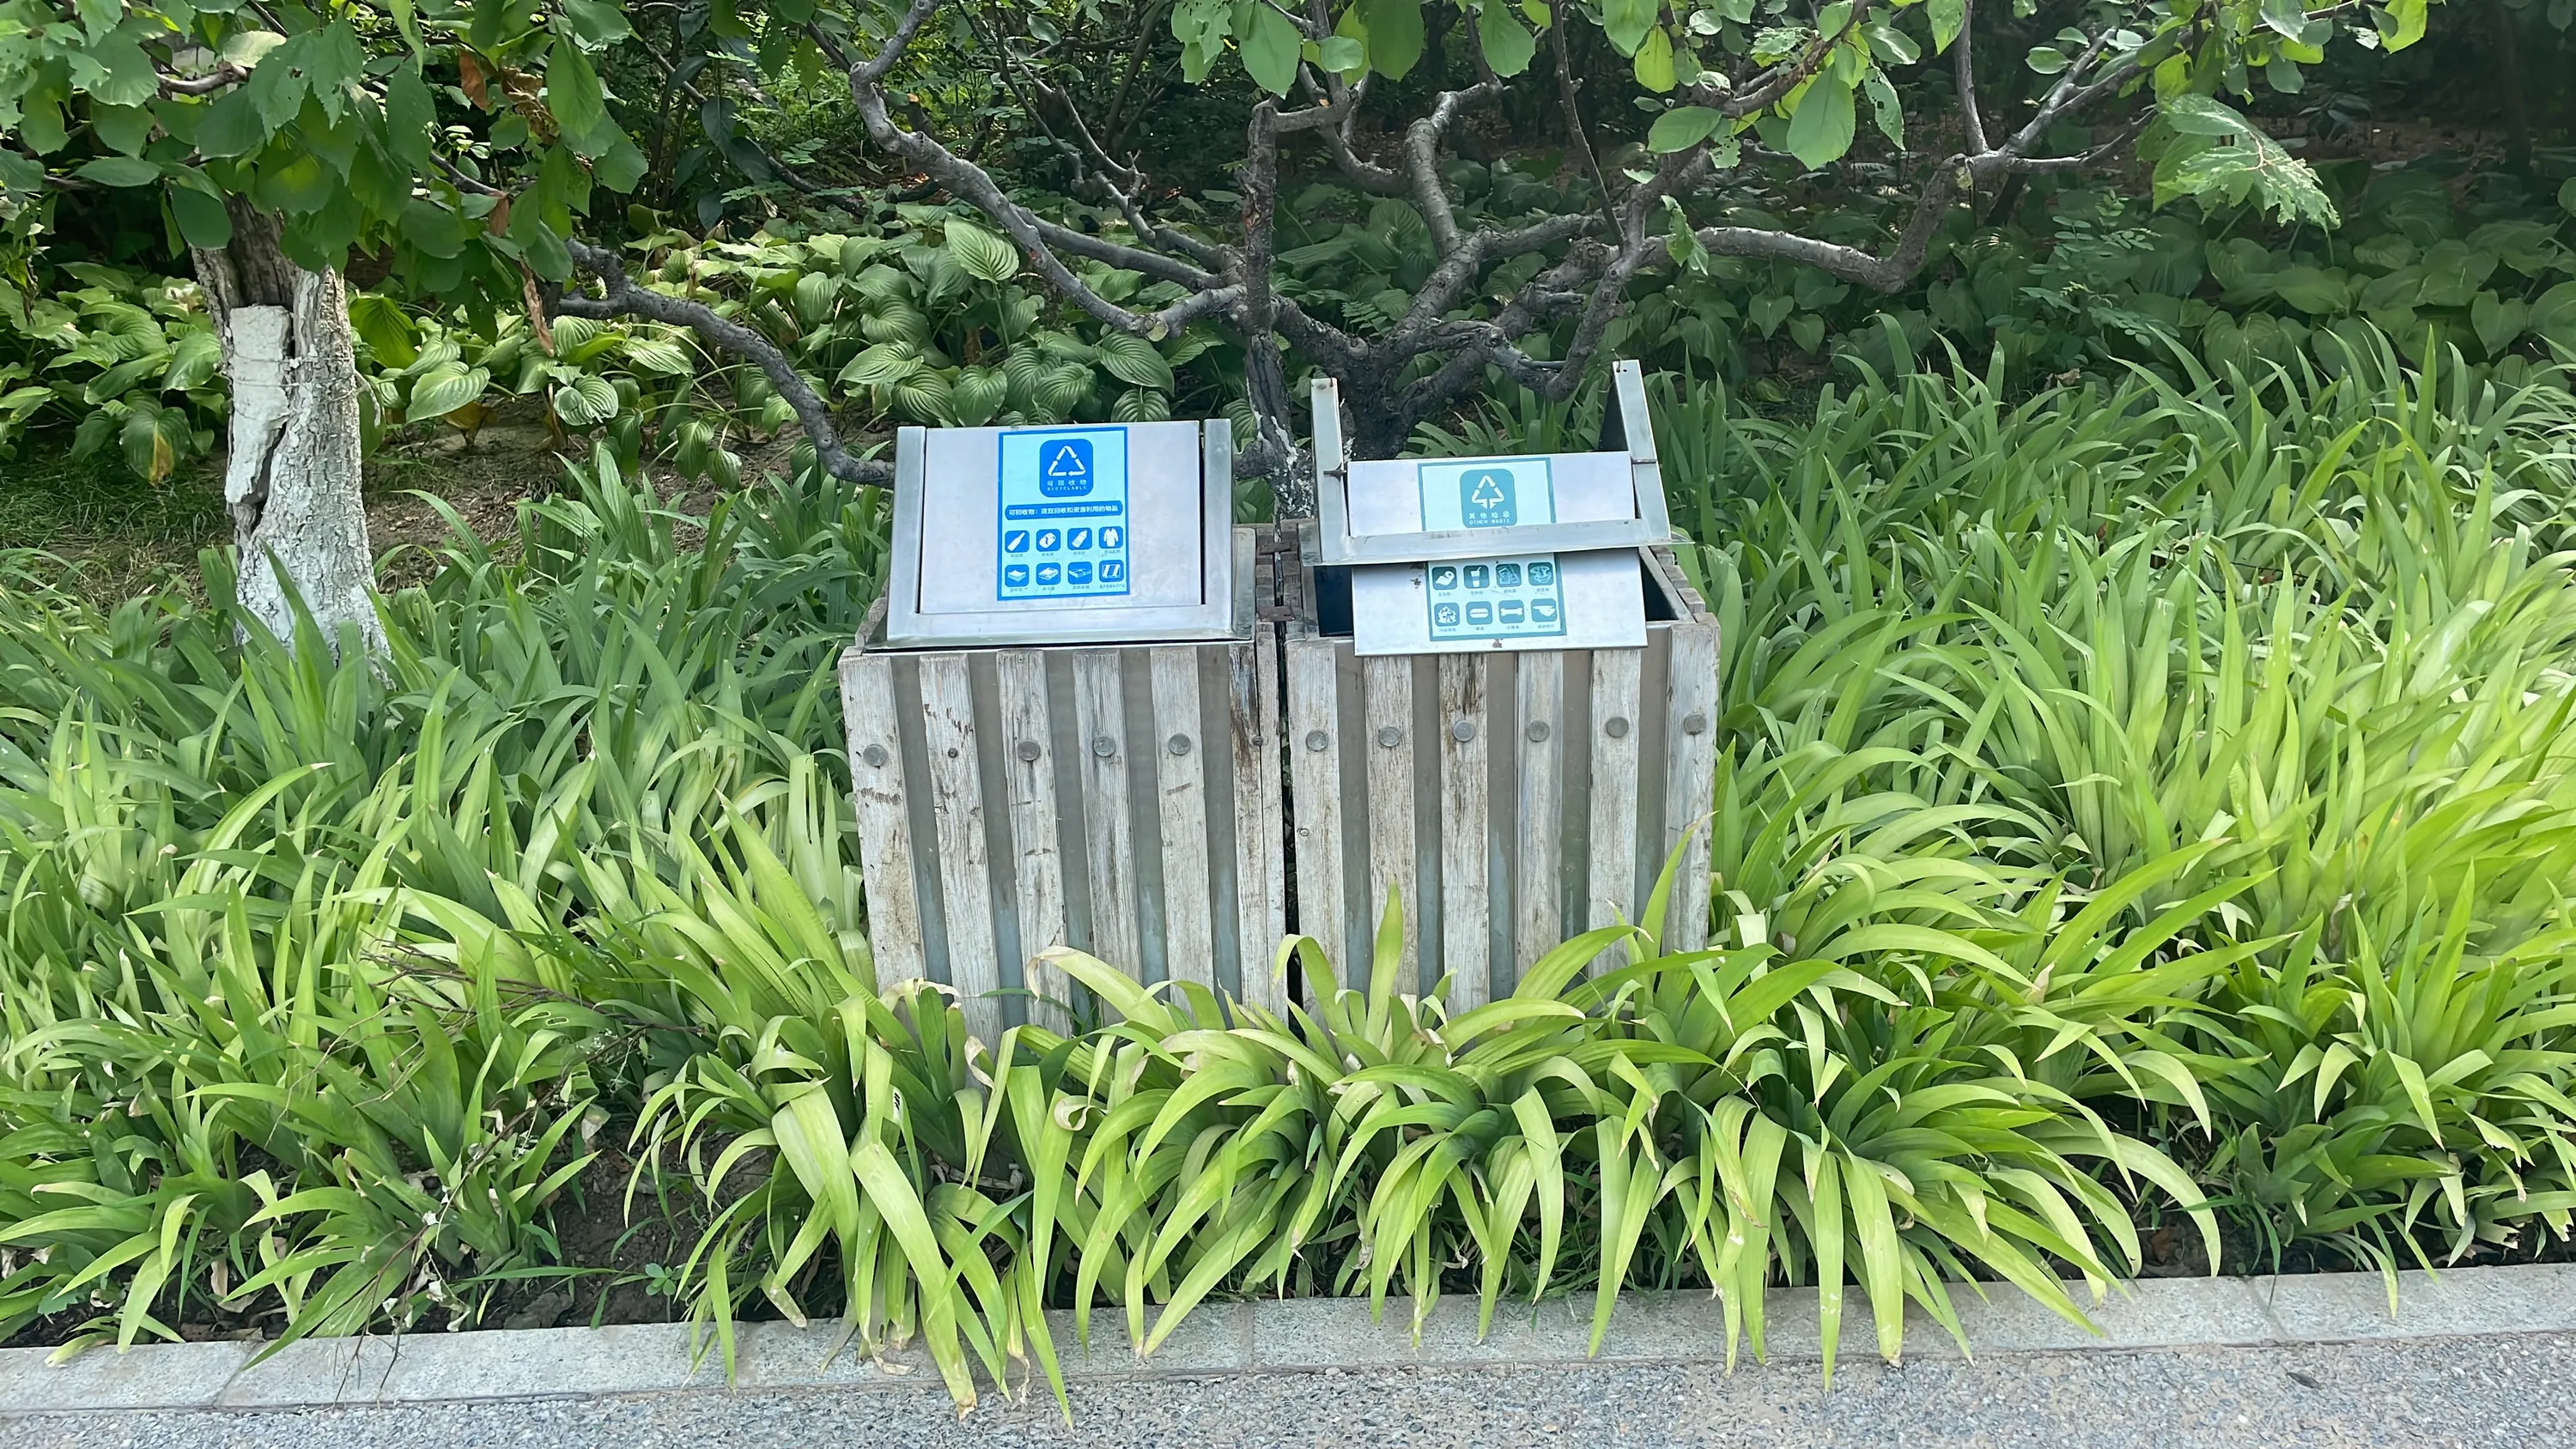
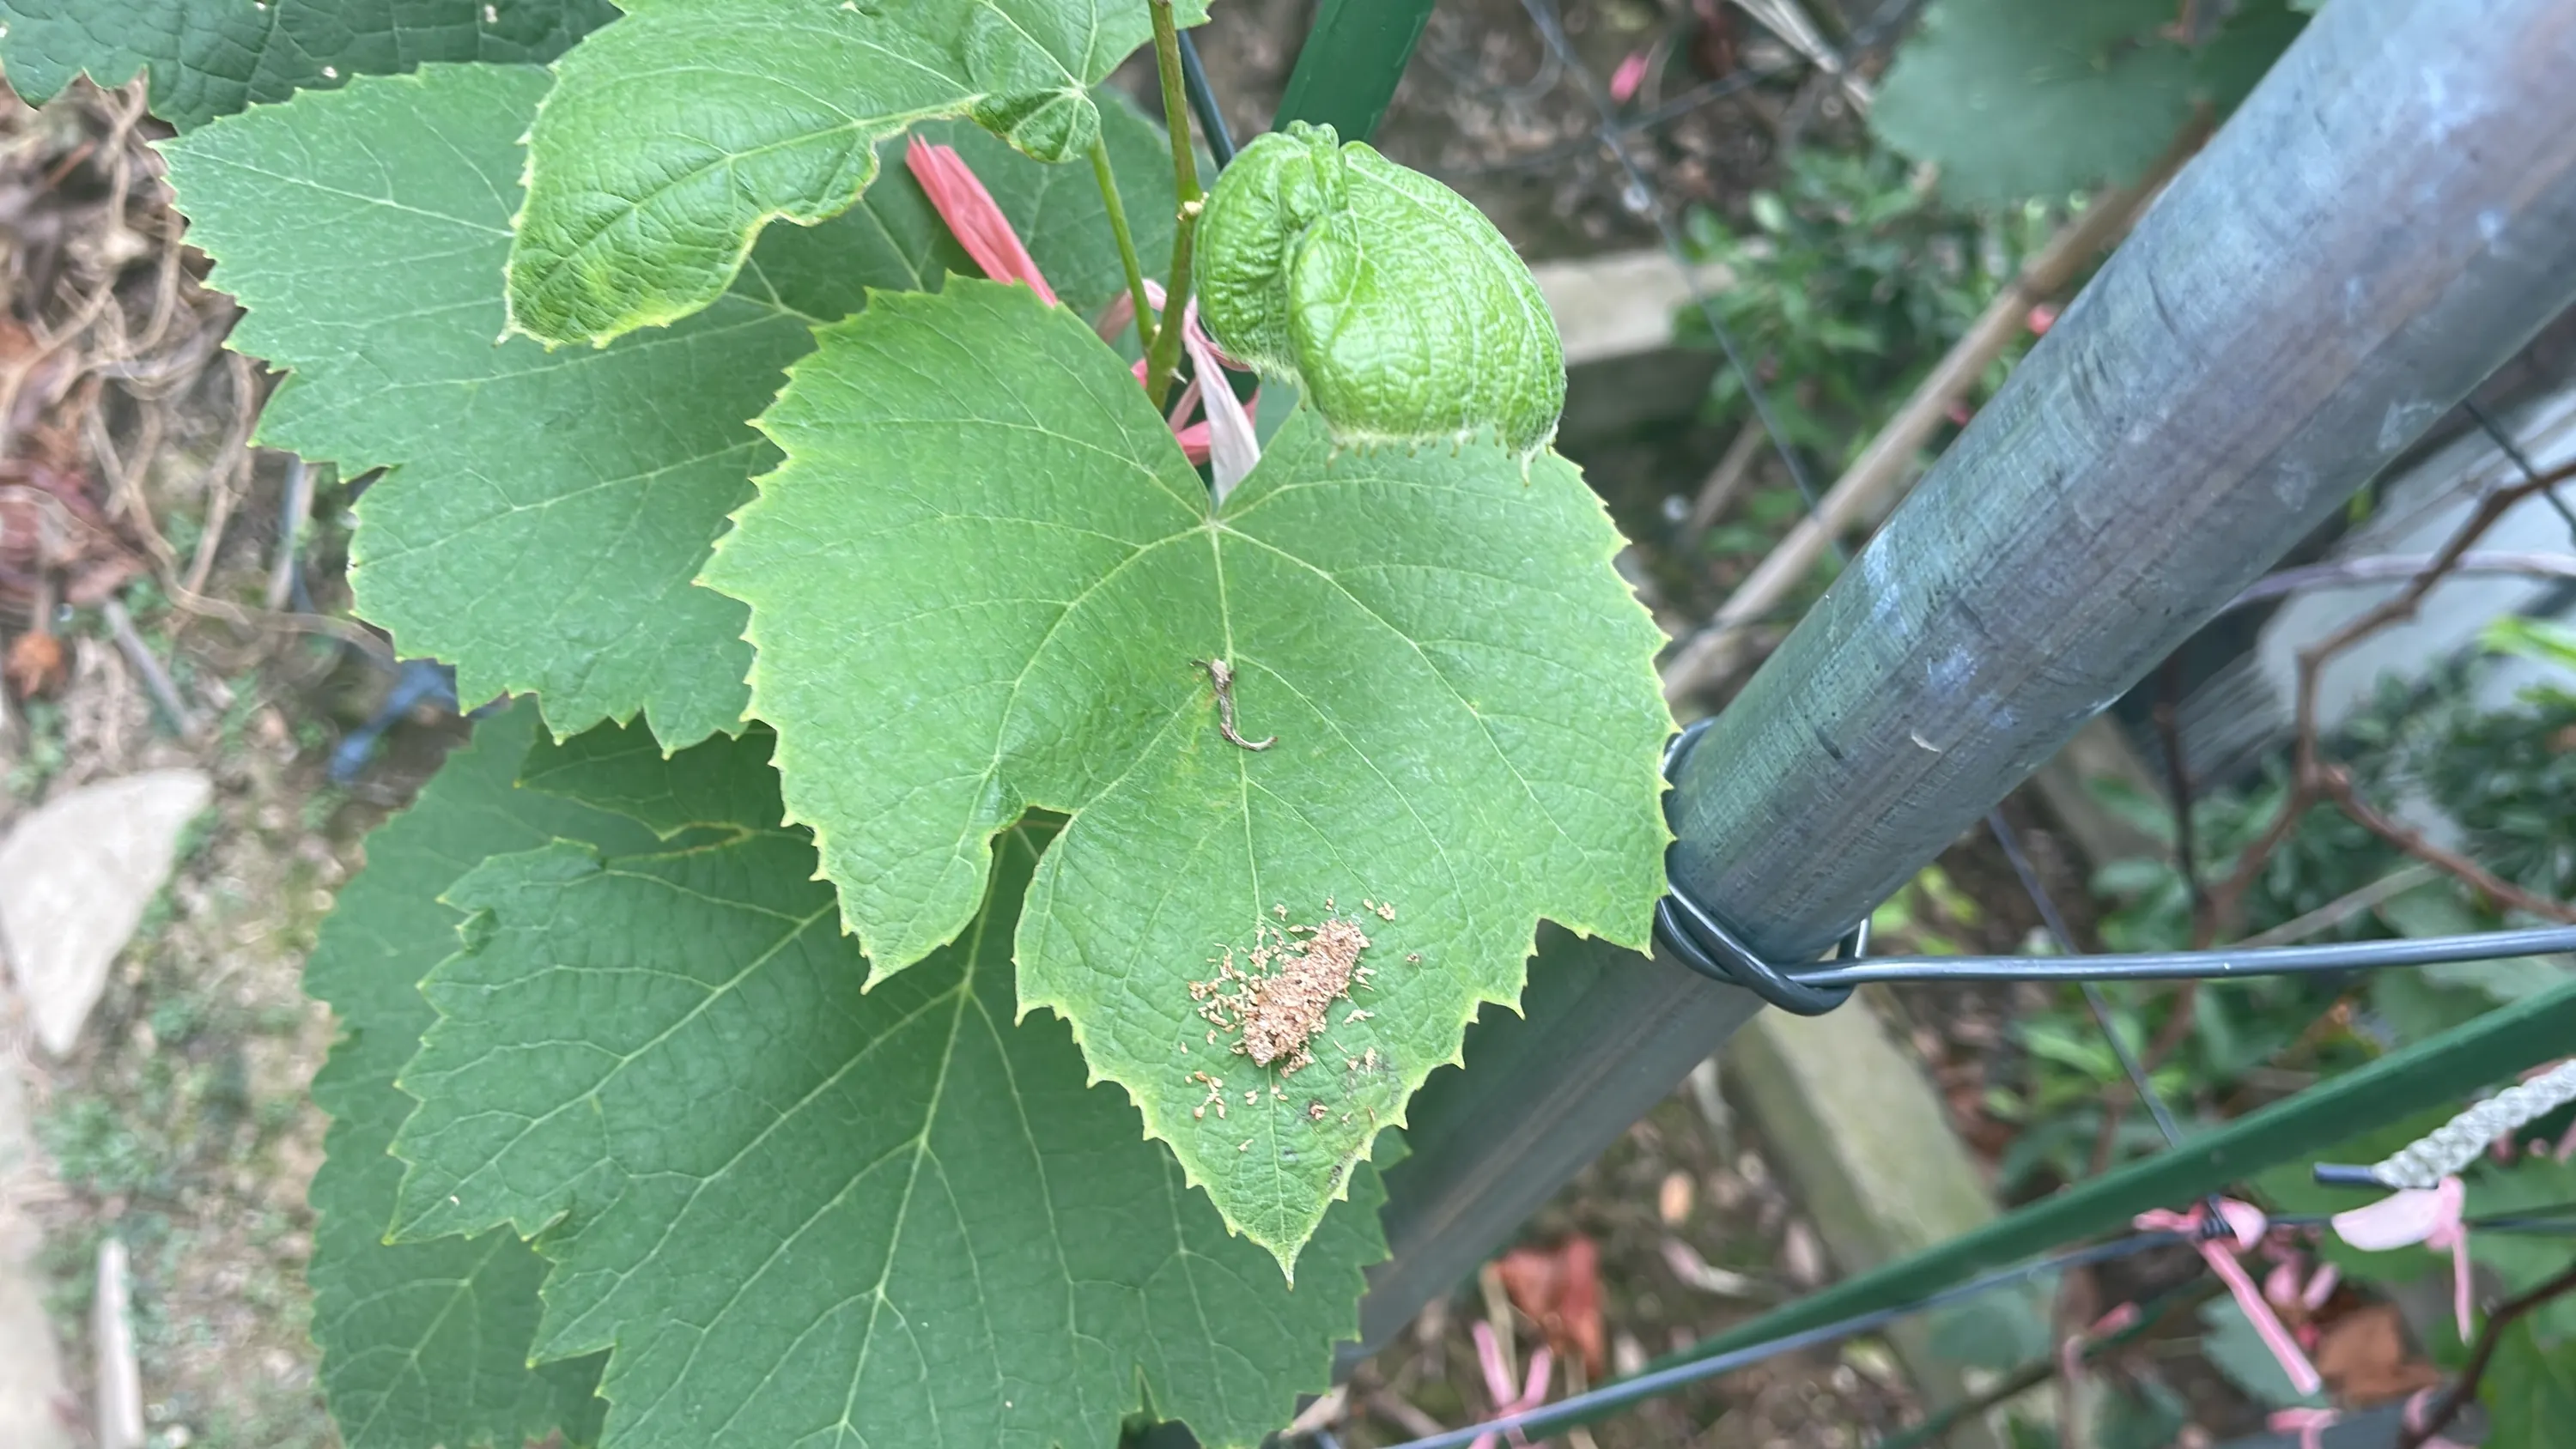
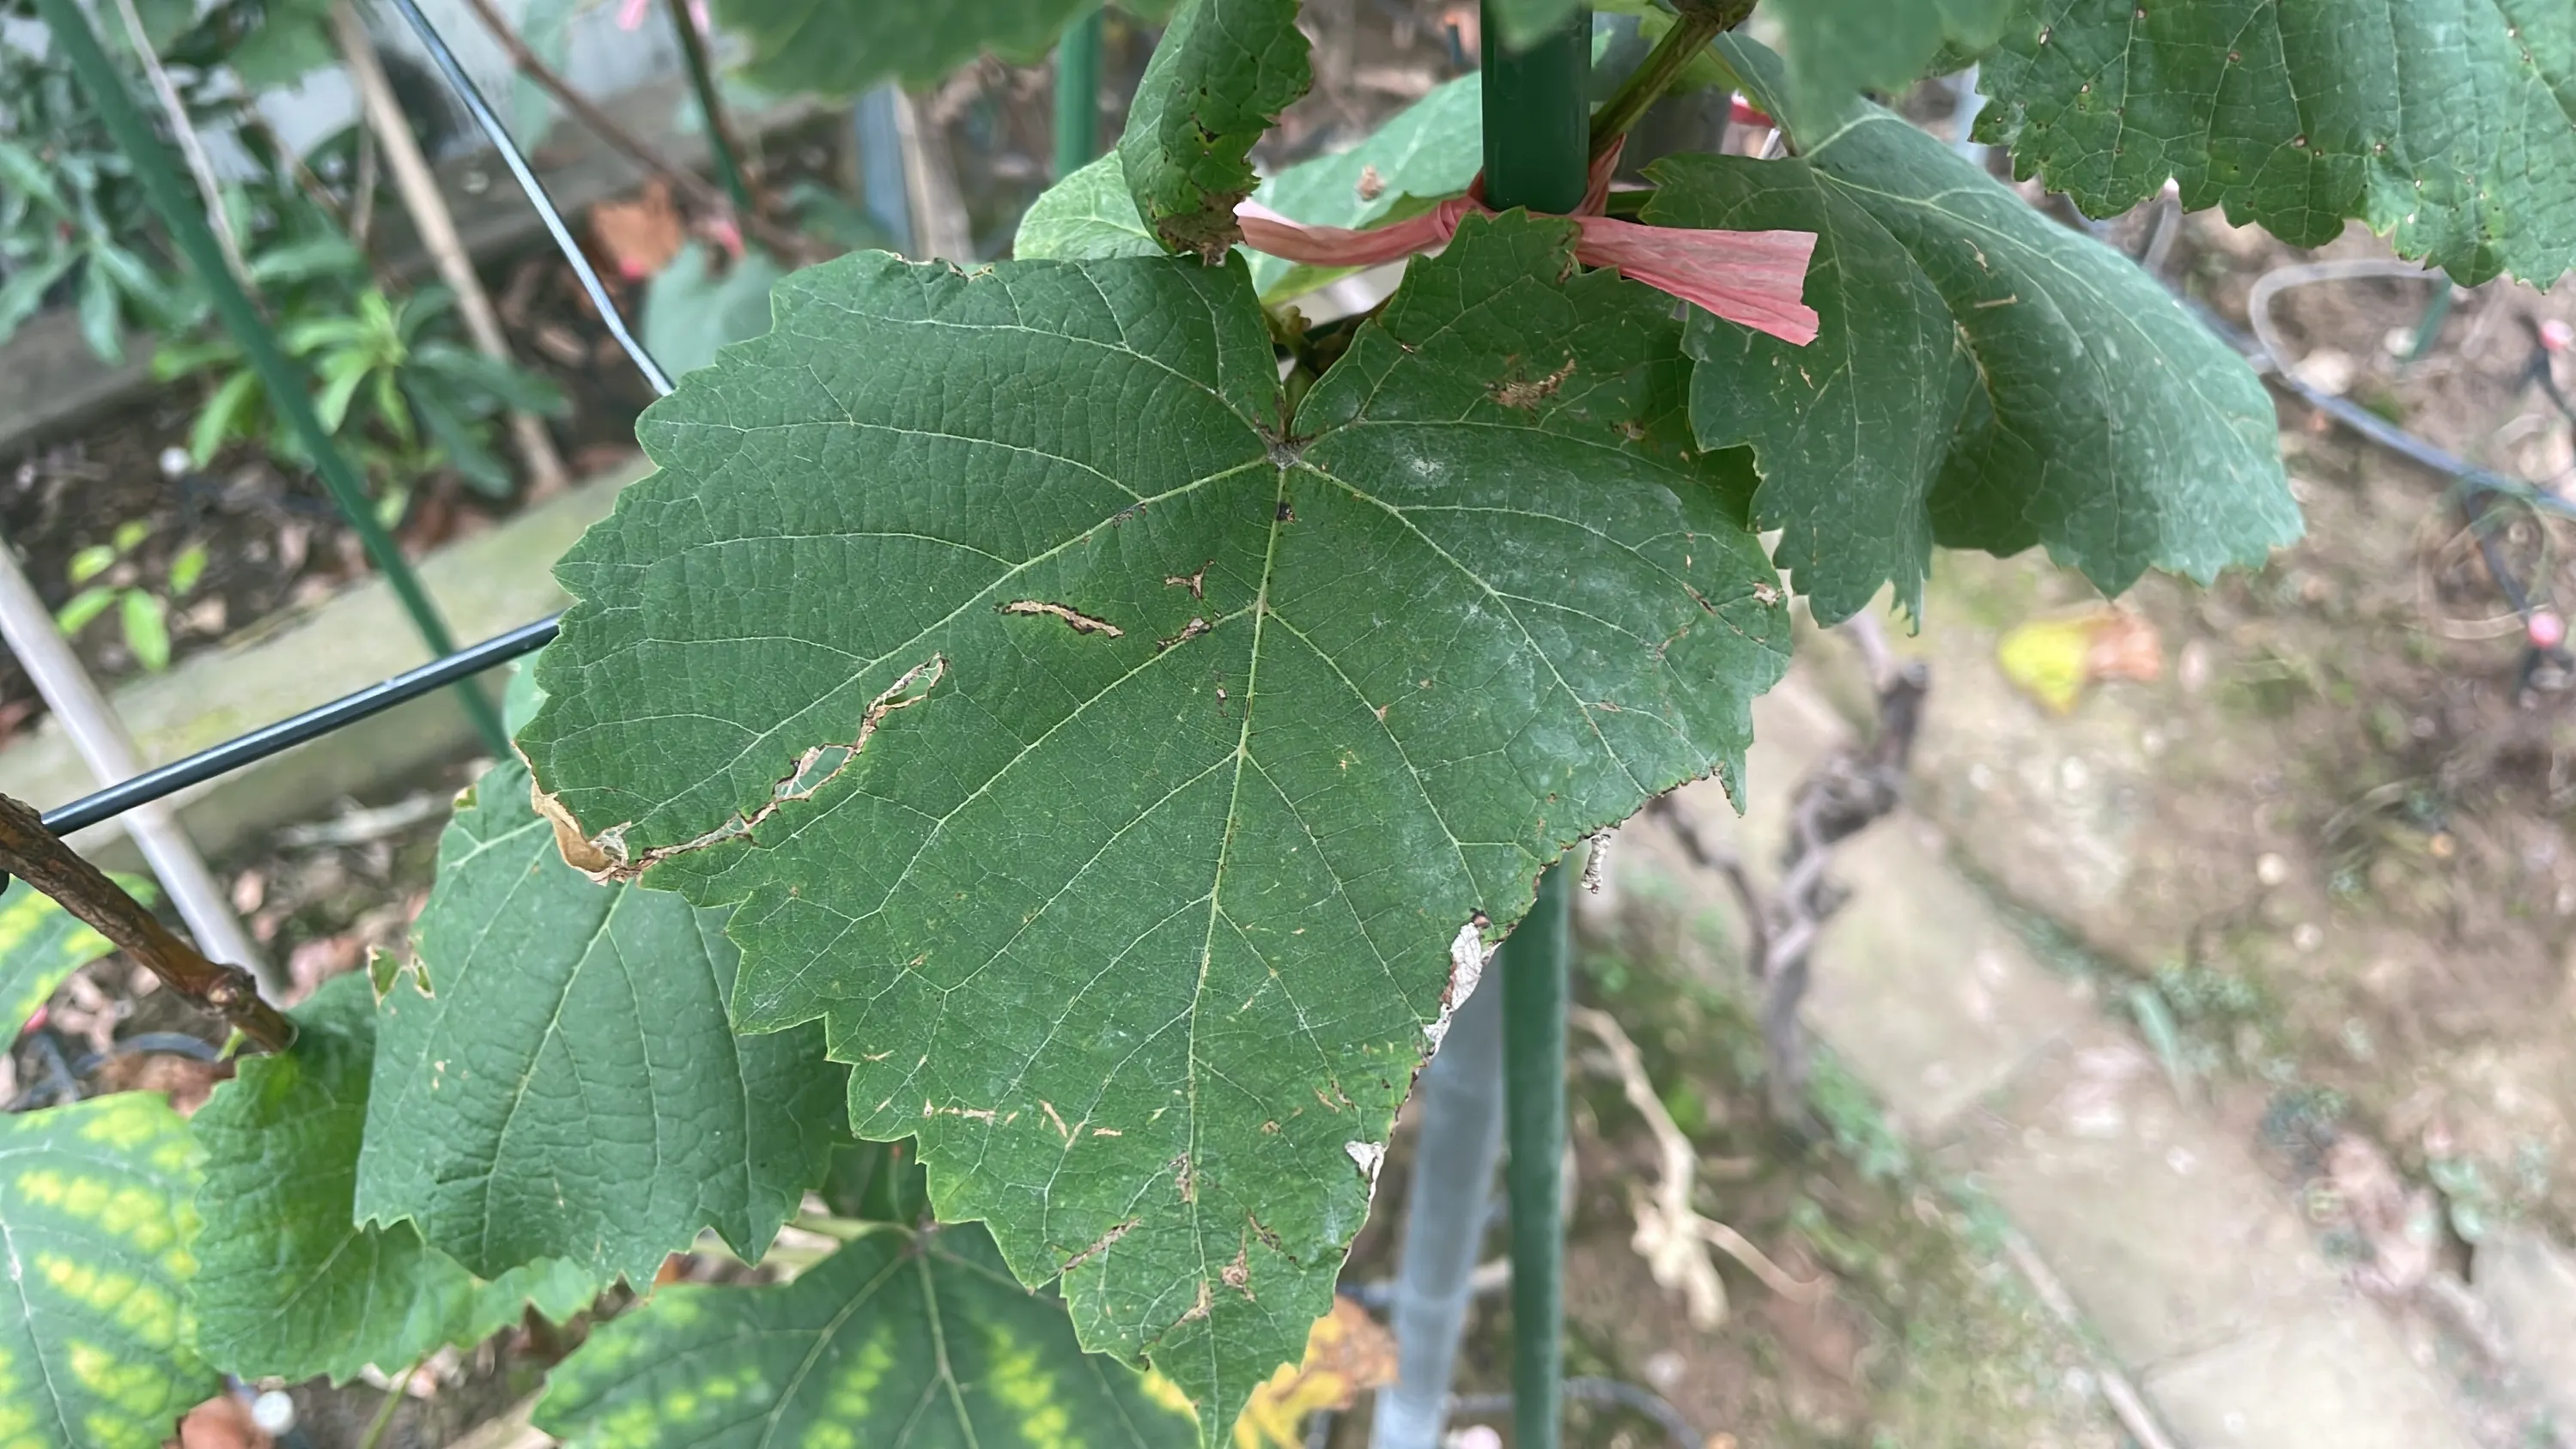
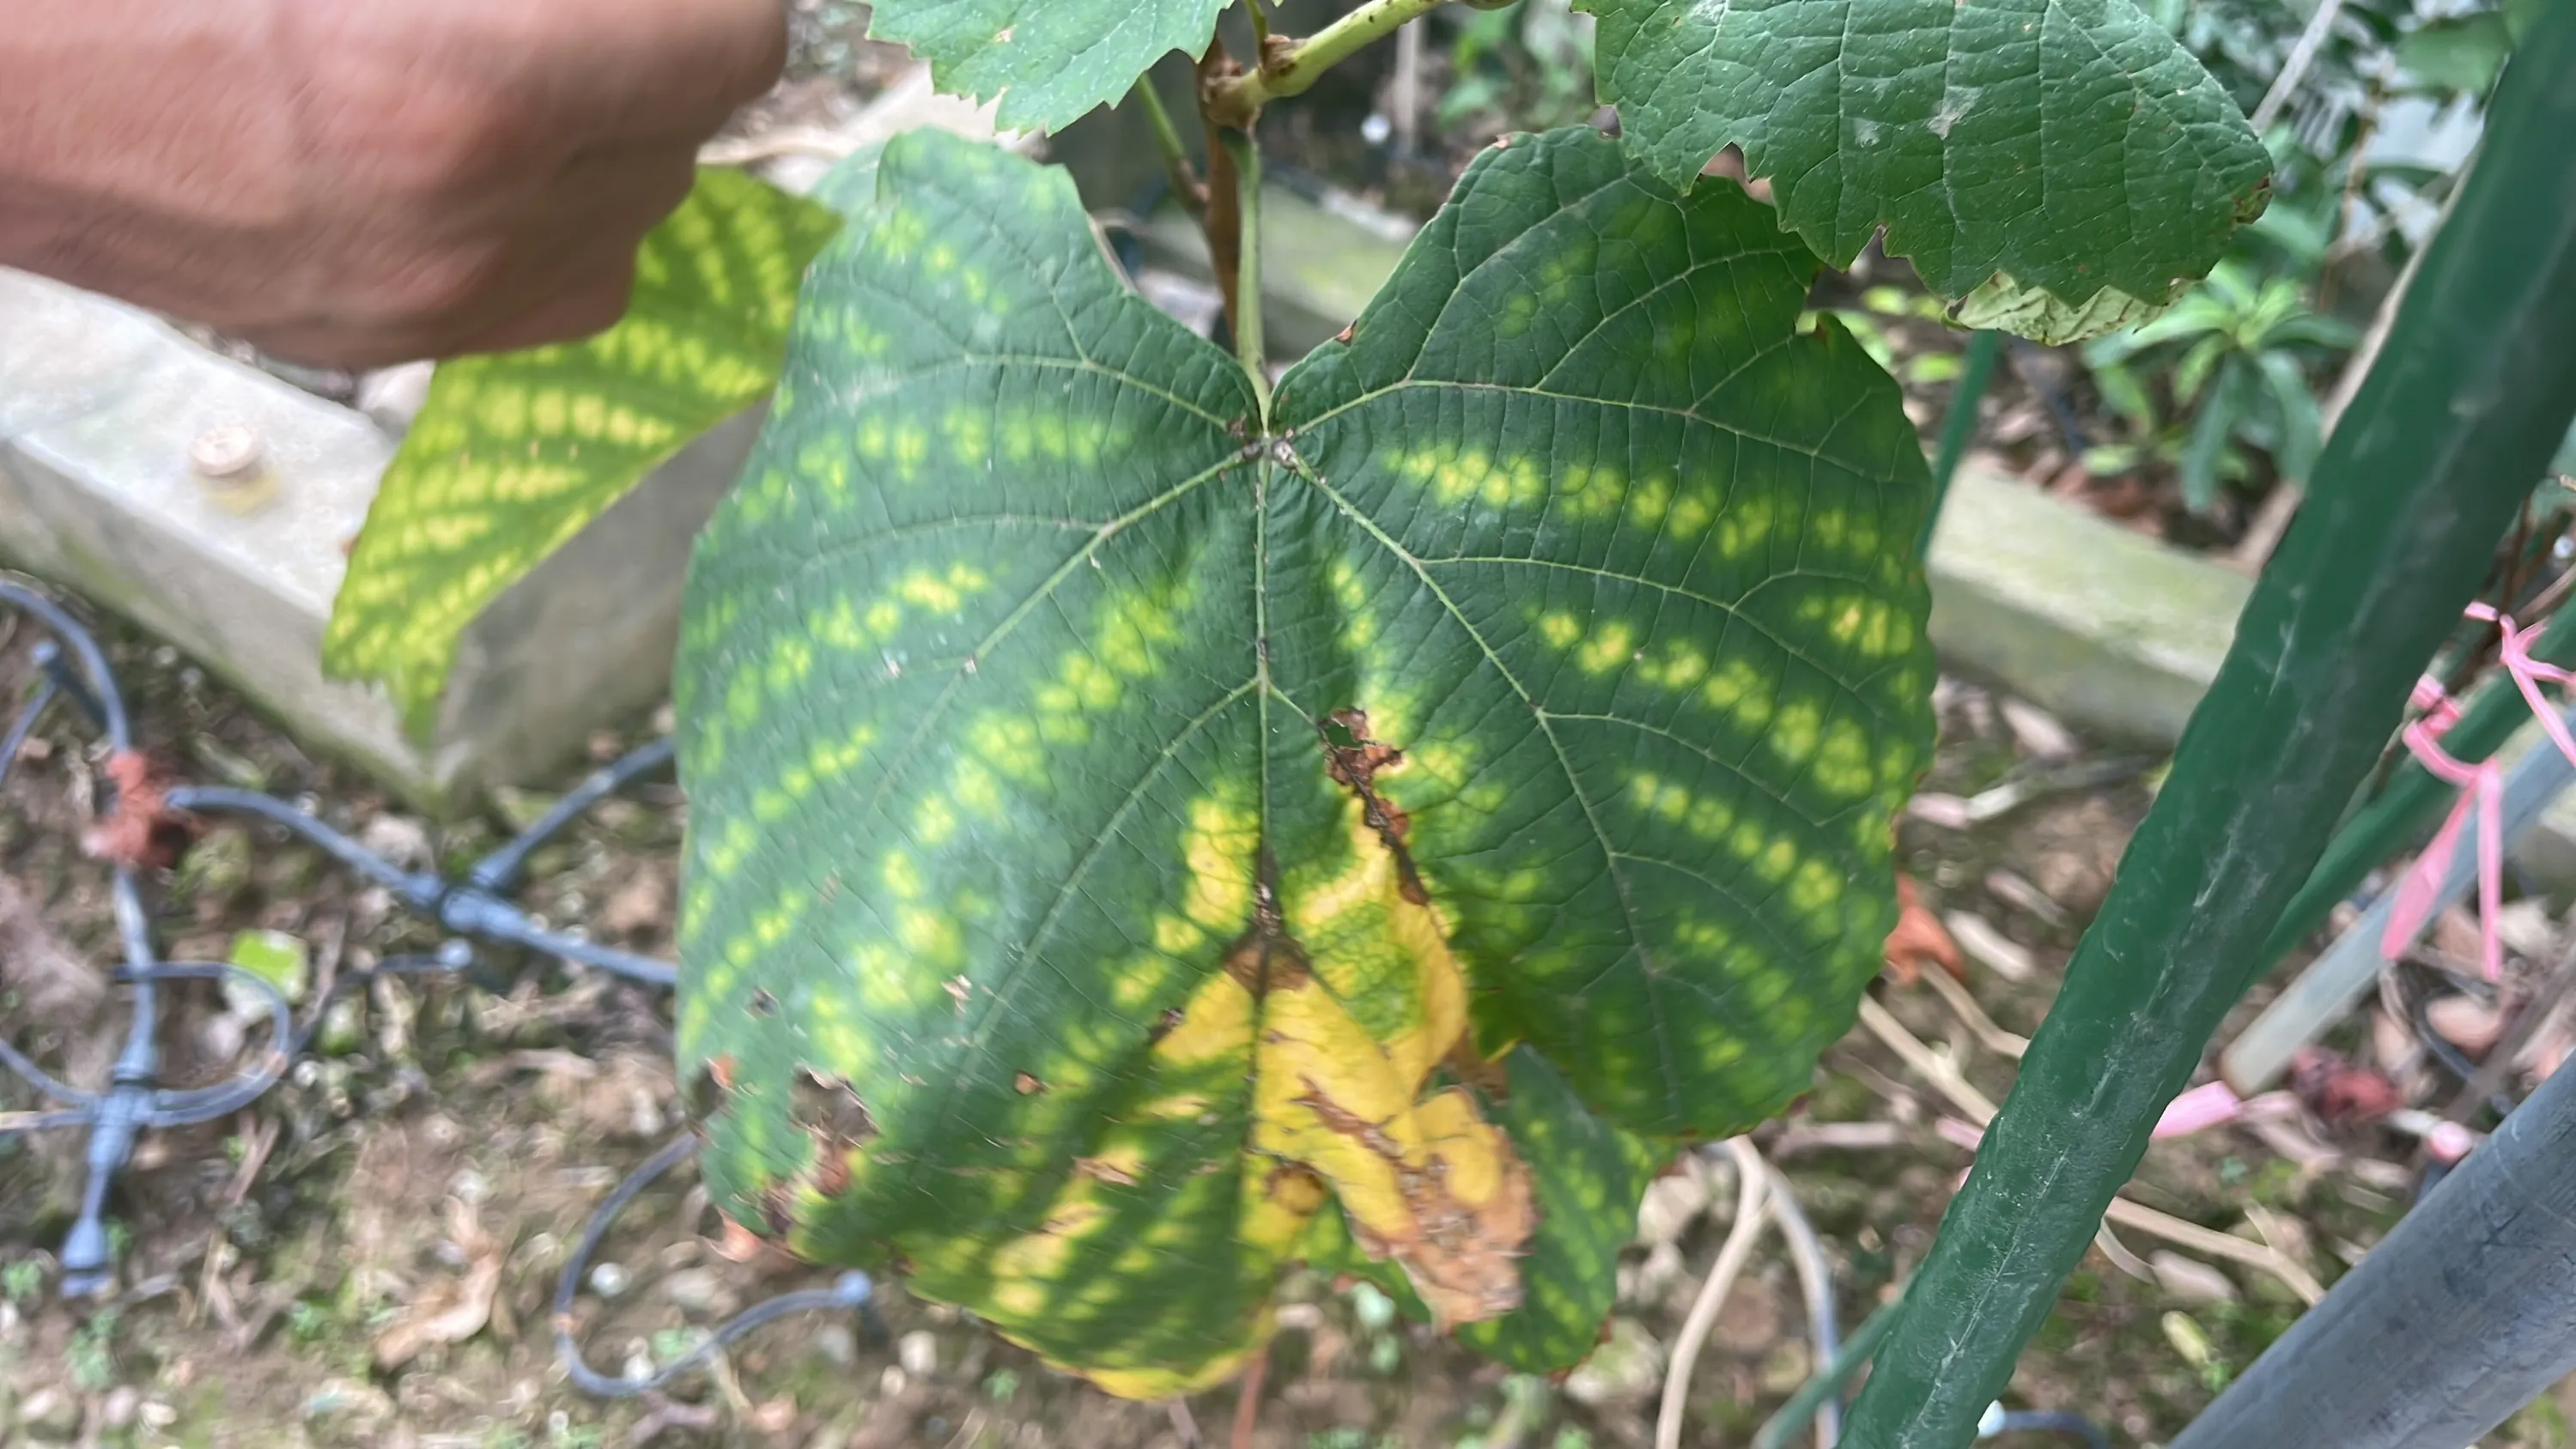
1 Find Repetitive things
Try to align their position and size
Or anything...
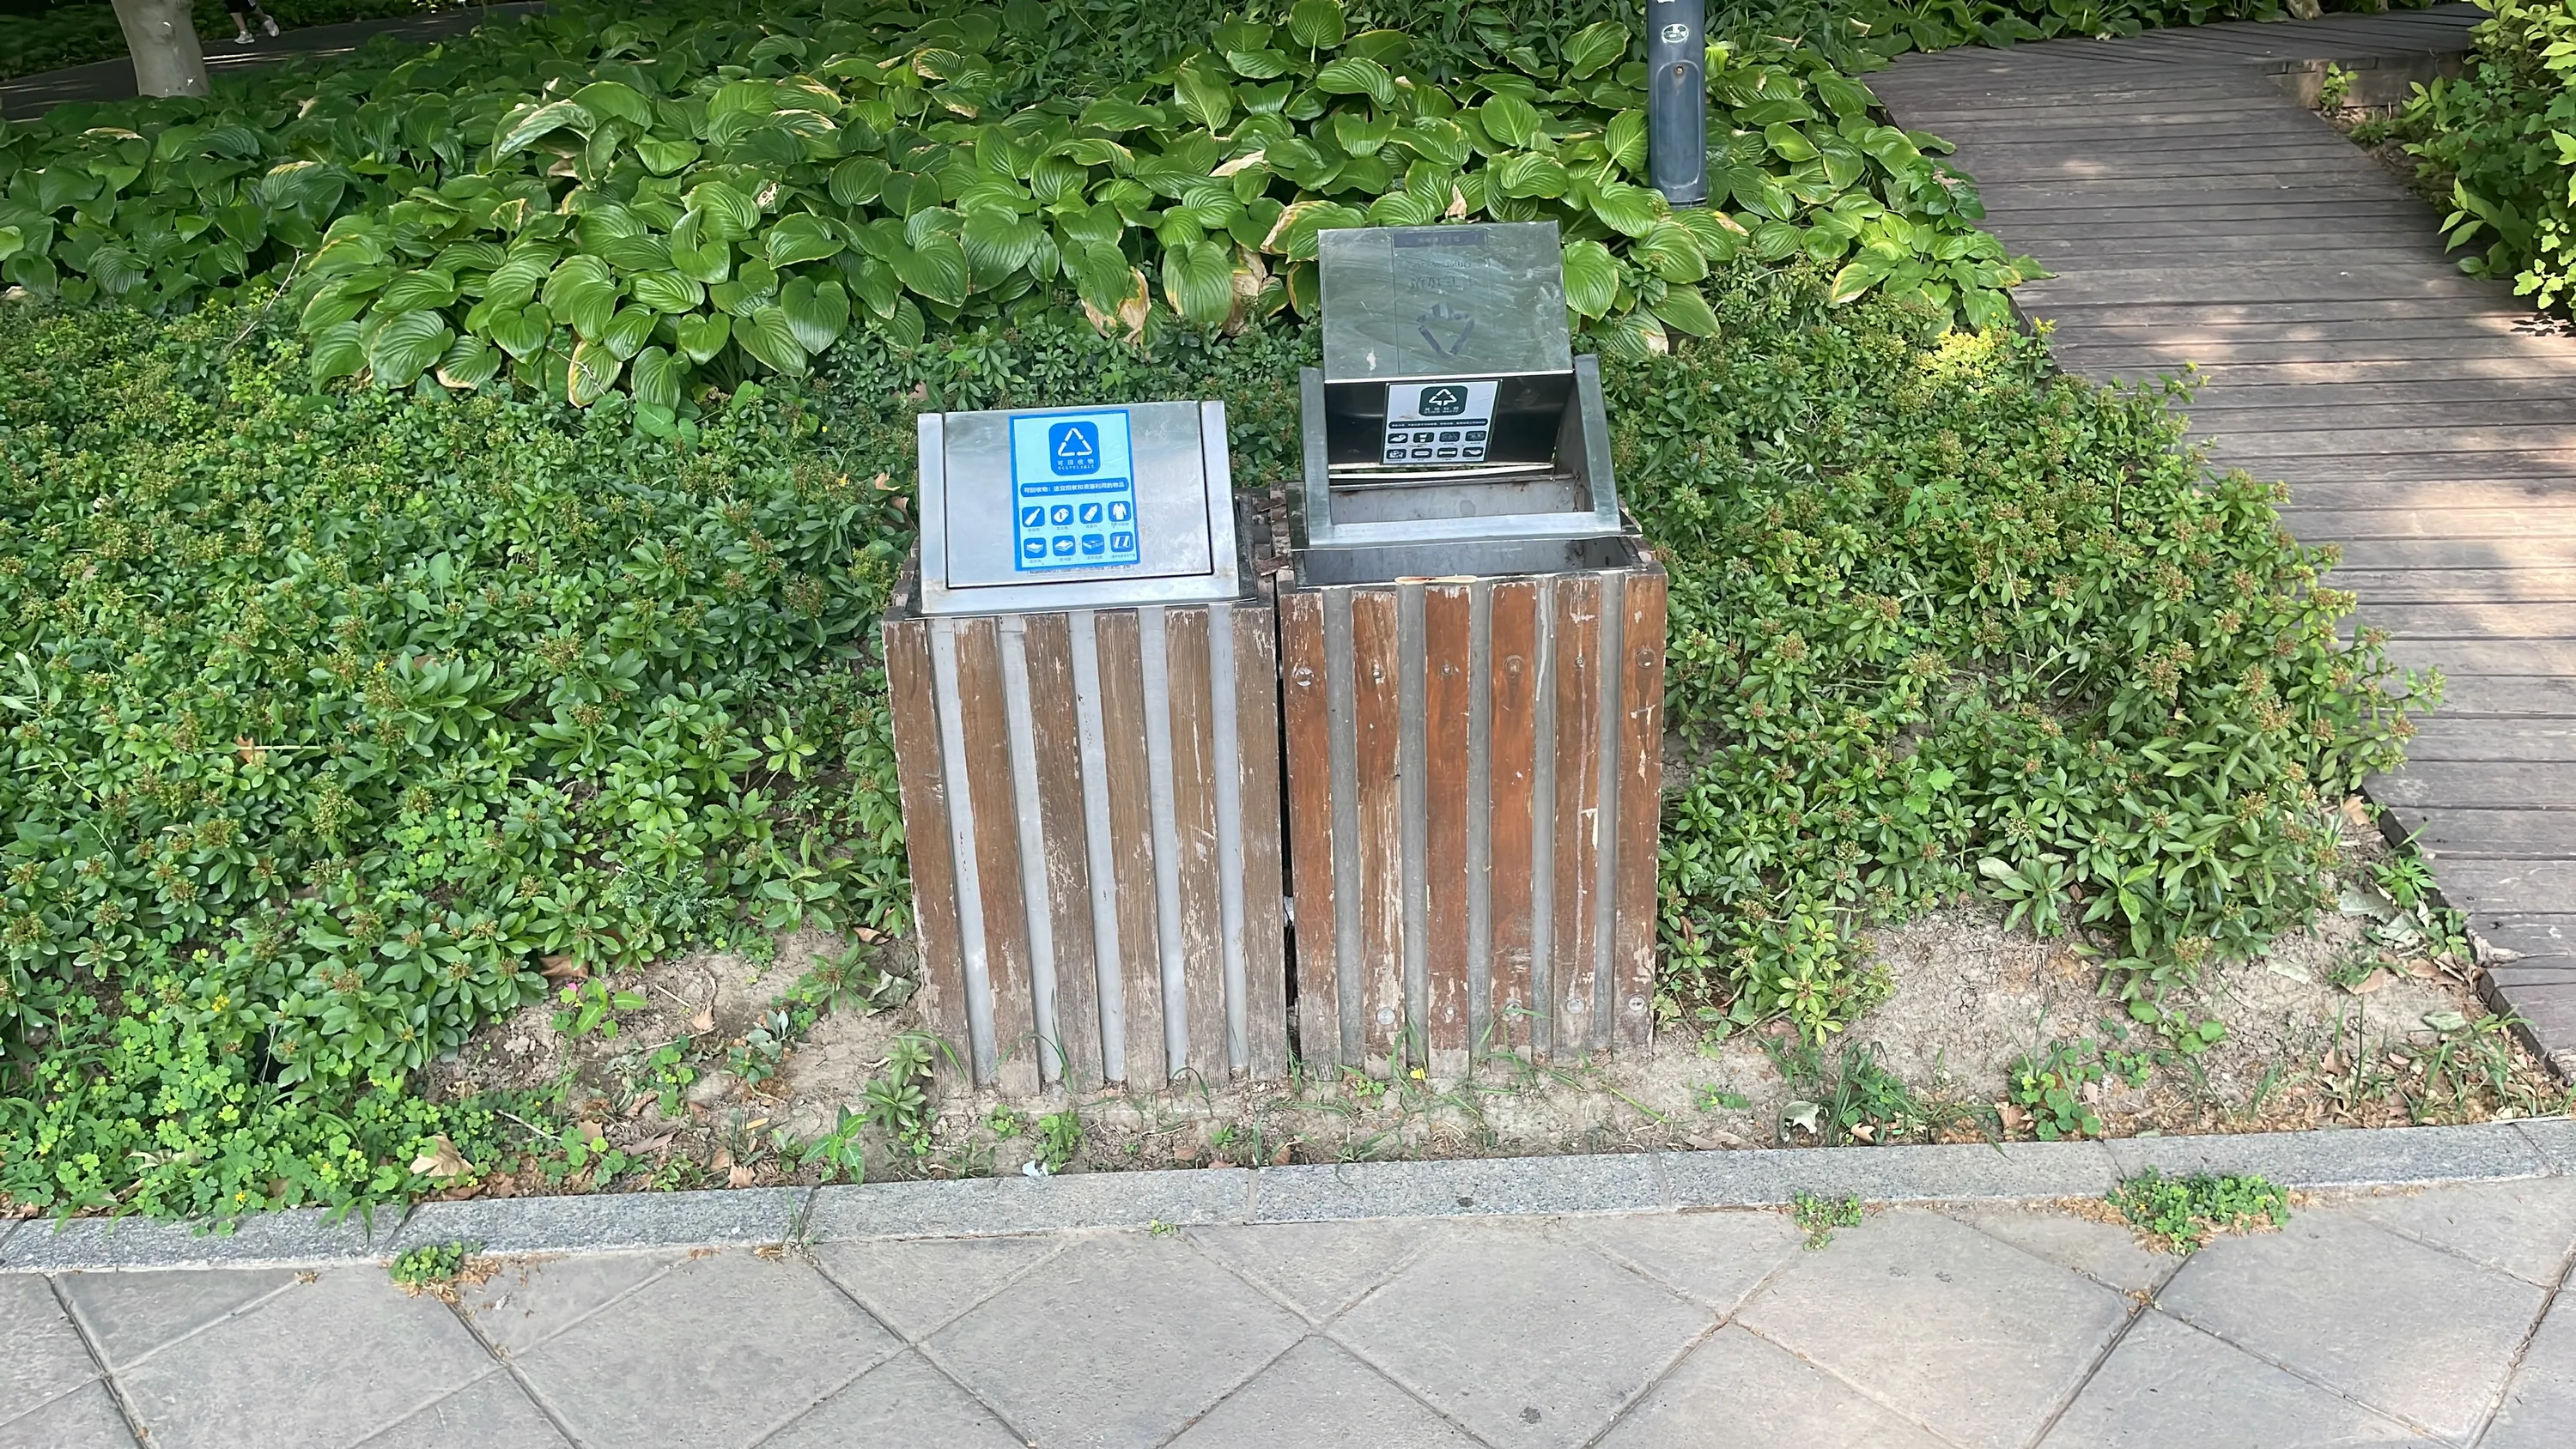
Trash Cans?
Leaves?
Original Tutorial
Here is the place for YOU to write your own tutorial! Anything accepted :D

Remember to select the tab “Frame”
pay attention DON’T overwrite it (don’t place a clip on top of another frame)
set every photo to duration of 2 frames
This page is under “Cut” workspace, and remember to click “Media Pool” panel

create “new project”
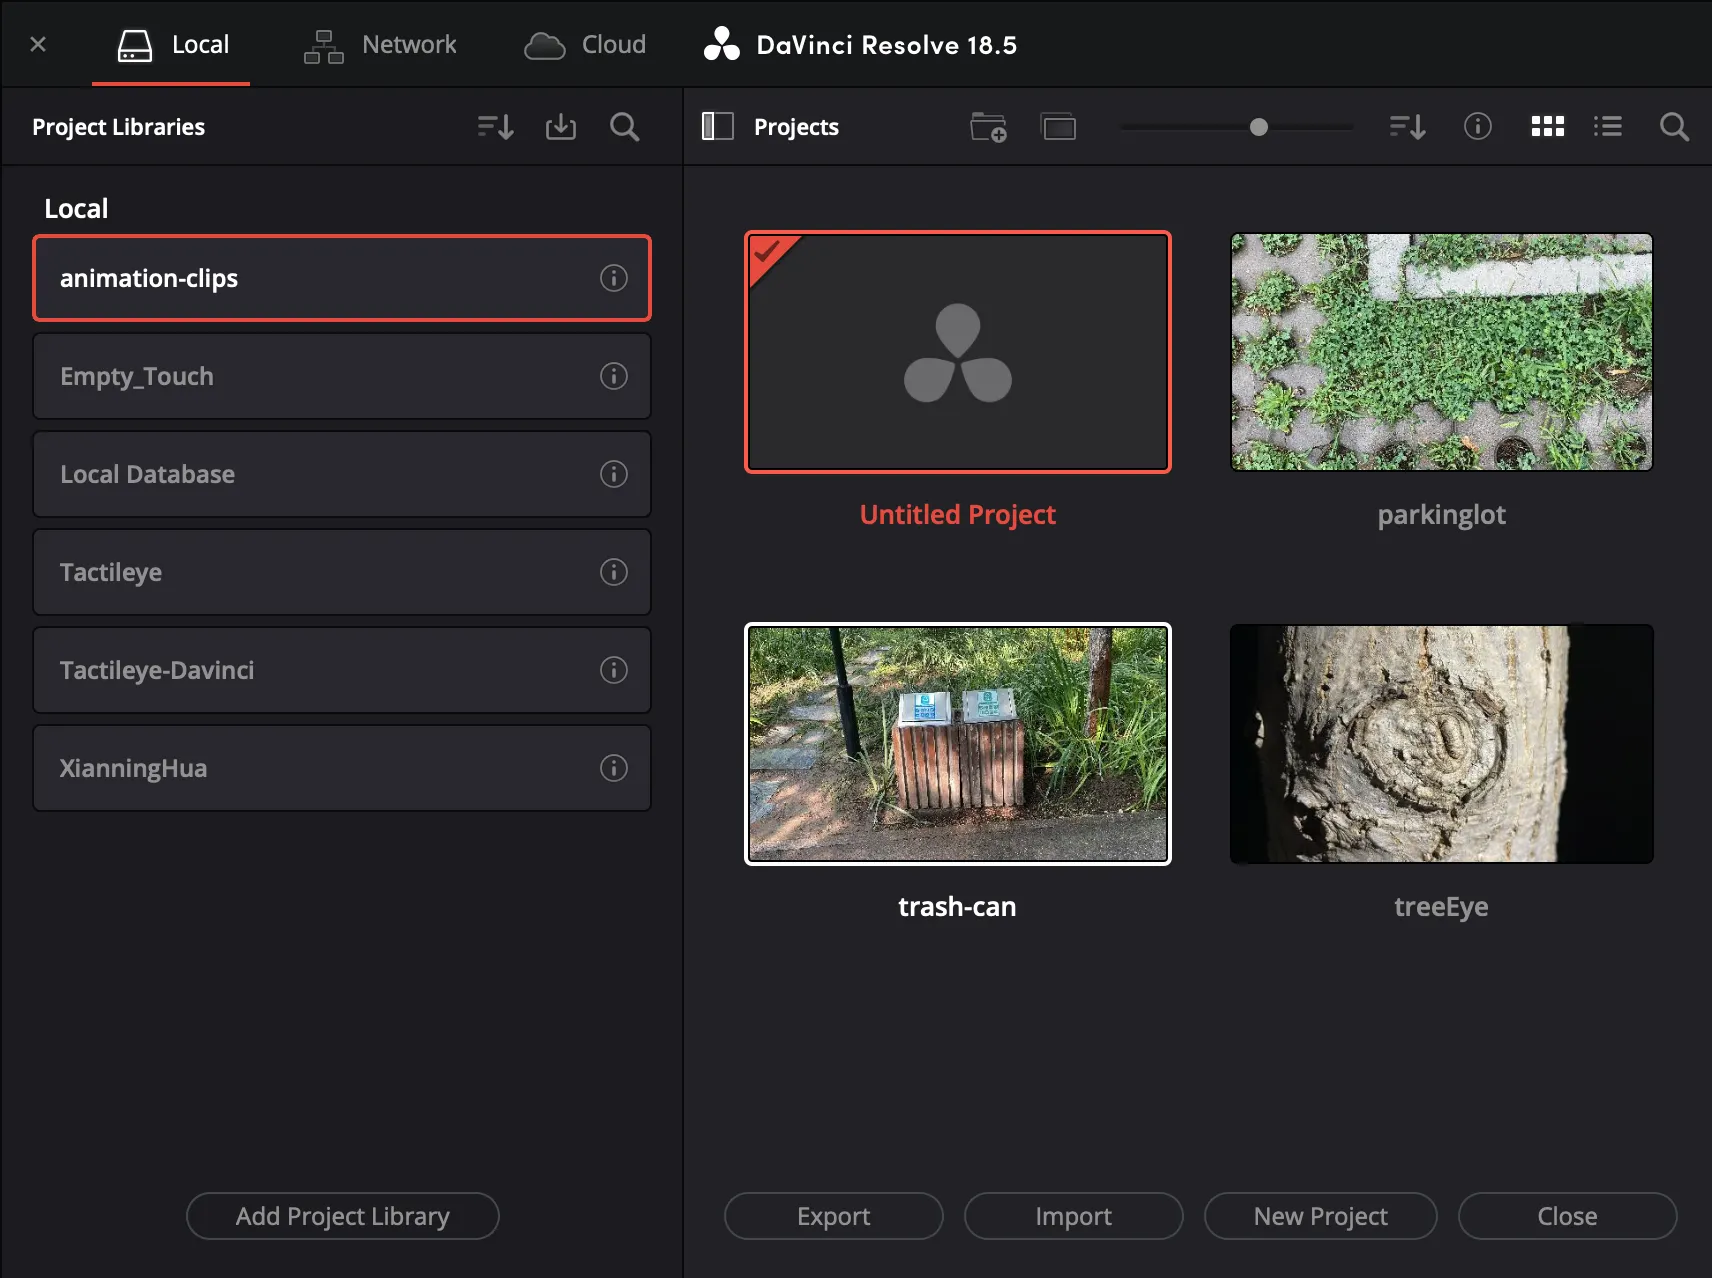
create “Project Library”
Dragonframe
export in h.264 (mp4) to wherever you want!
Once you r happy with it, just export it!


'%3e%3cpath%20d='m0%205.5h10'/%3e%3cpath%20d='m0%205.5h10'%20transform='matrix(0%201%20-1%200%2010.5%20.5)'/%3e%3c/g%3e%3c/svg%3e)
'%3e%3cpath%20d='m0%205.5h10'/%3e%3cpath%20d='m0%205.5h10'%20transform='matrix(0%201%20-1%200%2010.5%20.5)'/%3e%3c/g%3e%3c/svg%3e)
'%3e%3cpath%20d='m0%202h3'/%3e%3cpath%20d='m1.5%200%202%202.07267853-2%201.92732147'/%3e%3c/g%3e%3cg%20stroke-linecap='round'%20transform='matrix(0%20-1%201%200%208.5%2010.5)'%3e%3cpath%20d='m0%202h3'/%3e%3cpath%20d='m2%200%202%202.07267853-2%201.92732147'/%3e%3c/g%3e%3c/g%3e%3c/svg%3e)


'%3e%3ccircle%20cx='1.975536'%20cy='1.975536'%20fill='%23000'%20r='1.975536'/%3e%3ccircle%20cx='13.433644'%20cy='1.975536'%20fill='%23000'%20r='1.975536'/%3e%3cpath%20d='m4.95107171%205.58598549s2.296875%201.96875%205.24999999%200'%20stroke='%23000'%20stroke-linecap='round'%20stroke-linejoin='round'%20stroke-width='2'/%3e%3c/g%3e%3c/svg%3e)


'%3e%3cpath%20d='m.5%201.5h4'/%3e%3cpath%20d='m3.6798438%200%201%201.55267816-1%201.44732184'/%3e%3c/g%3e%3cpath%20d='m3.3%203.3h6.7c.5522847%200%201%20.44771525%201%201v.2c0%20.55228475-.4477153%201-1%201h-6.7z'%20stroke='%23000'%20stroke-linecap='square'%20stroke-linejoin='round'%20transform='matrix(.70710678%20-.70710678%20.70710678%20.70710678%20-1.017083%206.344544)'/%3e%3cpath%20d='m3.66310703%206.58754045c-.68349521-.34174757-1.36699042-.17087378-2.05048562.51262136-1.02524282%201.02524272-.55%202.83721683-1.06262141%203.34983819%200%200%202.60048562.7511327%203.62572843-.27411.68349521-.68349518.94158573-1.50879183.77427157-2.47589'%20fill='%23000'/%3e%3c/g%3e%3c/svg%3e)
'%3e%3cg%20stroke='%23000'%20stroke-linecap='round'%20stroke-linejoin='round'%20transform='translate(6.860078%207.1901)'%3e%3cpath%20d='m0%201.5h4'/%3e%3cpath%20d='m3.1798438%200%201%201.55267816-1%201.44732184'/%3e%3c/g%3e%3cpath%20d='m2.75000032%202.40017856h6.69999998c.5522847%200%201%20.44771525%201%201v.2c0%20.55228475-.4477153%201-1%201h-6.69999998z'%20stroke='%23000'%20stroke-linecap='square'%20stroke-linejoin='round'%20transform='matrix(.70710678%20-.70710678%20.70710678%20.70710678%20-.541905%205.692083)'/%3e%3cpath%20d='m3.11310703%205.68771866c-.68349521-.34174757-1.36699042-.17087379-2.05048562.51262136-1.02524282%201.02524272-.55%202.83721683-1.06262141%203.34983819%200%200%202.60048562.75113269%203.62572843-.27411.68349521-.68349518.94158573-1.50879183.77427157-2.47589'%20fill='%23000'%20fill-rule='nonzero'/%3e%3c/g%3e%3c/svg%3e)
'/%3e%3cpath%20d='m3.66310703%206.58754045c-.68349521-.34174757-1.36699042-.17087378-2.05048562.51262136-1.02524282%201.02524272-.55%202.83721683-1.06262141%203.34983819%200%200%202.60048562.7511327%203.62572843-.27411.68349521-.68349518.94158573-1.50879183.77427157-2.47589'%20fill='%23000'/%3e%3cpath%20d='m3%2010.1c-.38138877.1906944%203-1.1%204-.6.66666667.33333333%201.66666667%200%203-1'%20stroke='%23000'%20stroke-linecap='round'%20stroke-linejoin='round'/%3e%3c/g%3e%3c/svg%3e)


'/%3e%3c/g%3e%3c/svg%3e)
'%3e%3cg%20stroke='%23000'%20stroke-linecap='square'%20stroke-linejoin='round'%3e%3crect%20height='12'%20rx='2'%20width='12'/%3e%3cpath%20d='m.5%203.5h11'/%3e%3c/g%3e%3cpath%20d='m2%200h8c1.1045695%200%202%20.8954305%202%202v2h-12v-2c0-1.1045695.8954305-2%202-2z'%20fill='%23000'/%3e%3c/g%3e%3c/svg%3e)


'%3e%3cpath%20d='m3.48809814%200h5.01190186c1.9329966%200%203.5%201.56700338%203.5%203.5v1.58608772c0%201.93299662-1.5670034%203.5-3.5%203.5h-3.3717084l-1.85556433%202.41391228-1.09090909-2.41391228-.96301826-.71057931c-.7664577-.56554379-1.21879992-1.46146407-1.21879992-2.41398556v-1.97342471c0-1.92642341%201.56167473-3.48809814%203.48809814-3.48809814z'%20stroke='%23000'%20stroke-linecap='square'%20stroke-linejoin='round'/%3e%3cg%20fill='%23000'%3e%3ccircle%20cx='3'%20cy='4.5'%20r='1'/%3e%3ccircle%20cx='6'%20cy='4.5'%20r='1'/%3e%3ccircle%20cx='9'%20cy='4.5'%20r='1'/%3e%3c/g%3e%3c/g%3e%3c/svg%3e)


'/%3e%3c/svg%3e)
'%3e%3cpath%20d='m6.21099124%200%202.12659474%203.12659474h-8.33758598'/%3e%3cpath%20d='m5.8644069%200%202.1355931%203h-8'%20transform='matrix(-1%200%200%20-1%207.973179%208.5)'/%3e%3c/g%3e%3c/svg%3e)
'/%3e%3c/svg%3e)
'%3e%3cpath%20d='m-1.24410716%207.56519899c1.04742679-.69426478%201.52982145-2.12251507%201.52982145-3.56519899s-.48239466-2.87093421-1.52982145-3.56519899c.54485584-.27801557%201.16188619-.43480101%201.81553573-.43480101%202.209139%200%204%201.790861%204%204s-1.790861%204-4%204c-.65364954%200-1.27067989-.15678544-1.81553573-.43480101z'%20fill='%23000'%20transform='matrix(-1%200%200%20-1%204.571428%208)'/%3e%3ccircle%20cx='4'%20cy='4'%20r='4'/%3e%3c/g%3e%3c/svg%3e)
'/%3e%3c/svg%3e)
'%3e%3cpath%20d='m-.13804776%207.9372722c1.66967842-.35230709%202.42376205-2.13350825%202.42376205-3.9372722s-.75408363-3.58496511-2.42376205-3.9372722c.23026315-.0412162.46735759-.0627278.70947633-.0627278%202.209139%200%204%201.790861%204%204s-1.790861%204-4%204c-.24211874%200-.47921318-.0215116-.70947633-.0627278z'%20fill='%23000'%20transform='matrix(-1%200%200%20-1%204.571428%208)'/%3e%3ccircle%20cx='4'%20cy='4'%20r='4'/%3e%3c/g%3e%3c/svg%3e)
'%3e%3cg%20stroke-linecap='square'%3e%3crect%20fill='%23000'%20height='3.666667'%20rx='1.5'%20width='4'%20x='1'/%3e%3cpath%20d='m8.5.5%203%203'/%3e%3cpath%20d='m8.5.5%203%203'%20transform='matrix(0%201%20-1%200%2012%20-8)'/%3e%3c/g%3e%3cg%20transform='translate(.7%206)'%3e%3cpath%20d='m2.5%202.5v2'%20stroke-linecap='square'/%3e%3cpath%20d='m2.5%202.5%202-2'/%3e%3cpath%20d='m.5%202.5%202-2'%20transform='matrix(-1%200%200%201%203%200)'/%3e%3c/g%3e%3c/g%3e%3c/svg%3e)
'%3e%3cpath%20d='m3%200h6v6h-6z'/%3e%3cpath%20d='m6%207.5v1.5h-6v-6h1.5'/%3e%3c/g%3e%3c/svg%3e)
'%3e%3ccircle%20cx='1.5'%20cy='6'%20r='1.5'%20stroke-linecap='square'/%3e%3ccircle%20cx='1.5'%20cy='1.5'%20r='1.5'%20stroke-linecap='square'%20transform='rotate(180%201.5%201.5)'/%3e%3cpath%20stroke-linecap='round'%20d='M3%205.268L11.91.951M3%202.732l8.91%204.317'/%3e%3c/g%3e%3c/svg%3e)


'%3e%3ccircle%20cx='3'%20cy='3'%20r='3'/%3e%3cpath%20d='m11.6%200%203.6%206h-7.2z'/%3e%3c/g%3e%3c/svg%3e)
'%3e%3cpath%20d='m.5%204.95999926c.80476436-1.59325218%201.72466915-2.38987827%202.75971436-2.38987827h5.24028564'/%3e%3cpath%20d='m6.4848272%200%202.0151728%202.57012099-2.0151728%202.38987827'/%3e%3c/g%3e%3c/svg%3e)
'%3e%3ccircle%20cx='6'%20cy='6'%20r='6'%20stroke='%23000'%20stroke-linecap='square'%20stroke-linejoin='round'/%3e%3cg%20fill='%23000'%3e%3cpath%20d='m3.81818182%207.63636364s.54545454%201.63636363%202.18181818%201.63636363%202.18181818-1.63636363%202.18181818-1.63636363z'%20stroke='%23000'%20stroke-linecap='round'%20stroke-linejoin='round'/%3e%3ccircle%20cx='3.818182'%20cy='4.363636'%20r='1.090909'/%3e%3ccircle%20cx='8.181818'%20cy='4.363636'%20r='1.090909'/%3e%3c/g%3e%3c/g%3e%3c/svg%3e)
'%3e%3cg%20stroke-linecap='square'%3e%3cpath%20d='m0%205.5h6v3h-6z'/%3e%3cpath%20d='m.5%205%204.5-4.5'/%3e%3cpath%20d='m6.5%205%204.5-4.5'/%3e%3c/g%3e%3cpath%20d='m6%208.5%205.5-5.5v-3h-6'%20stroke-linecap='round'/%3e%3c/g%3e%3c/svg%3e)
'%3e%3cpath%20d='m8%202.46575459v6.53424541h-8v-9h5.33544759z'%20stroke-linecap='square'/%3e%3cpath%20d='m5.33544759%200v2.73972732h2.66455241'/%3e%3cg%20stroke-linecap='round'%3e%3cpath%20d='m1.5%202.5h2'/%3e%3cpath%20d='m1.5%204.5h4'/%3e%3cpath%20d='m5.5%204.5h1'/%3e%3cpath%20d='m5.5%206.5h1'/%3e%3cpath%20d='m1.5%206.5h2'/%3e%3c/g%3e%3c/g%3e%3c/svg%3e)
'/%3e%3crect%20height='4.363636'%20rx='.5'%20width='1.090909'%20x='5.454545'%20y='5.454545'/%3e%3c/g%3e%3c/svg%3e)
'%3e%3cpath%20d='m8.93959492%206.58245207c-1.10569144%200-2.10974996.46182439-3.02339821%201.35711742.91364825.89534389%201.91770677%201.35716829%203.02339821%201.35716829%201.10561608%200%202.10961298-.4617614%203.02321128-1.35693423-.9133243-.89546408-1.9174444-1.35735148-3.02321128-1.35735148z'%20stroke='%23000'%20transform='matrix(.70710678%20-.70710678%20.70710678%20.70710678%20-2.995795%208.646702)'/%3e%3cpath%20d='m3.93959492%206.58245207c-1.10561603%200-2.10961299.4617614-3.02321126%201.35693423.91332433.89546408%201.9174444%201.35735148%203.02321126%201.35735148%201.10561603%200%202.109613-.4617614%203.02321127-1.35693423-.91332433-.89546408-1.9174444-1.35735148-3.02321127-1.35735148z'%20stroke='%23000'%20transform='matrix(-.70710678%20-.70710678%20-.70710678%20.70710678%2012.339451%205.111168)'/%3e%3cpath%20d='m6.50001074%205.6c2.20913222%200%203.49998926-1.54289563%203.49998926-3.44615385%200-1.10824993%200-2.15384615-.5-2.15384615-.33333333%200-.83333333.43076923-1.5%201.29230769-.66666667-.86153846-1.16666309-1.29230769-1.49998926-1.29230769-.33376898%200-.83376744.43076923-1.4999954%201.29230769-.66666462-.86153846-1.16666308-1.29230769-1.4999954-1.29230769-.50001994%200-.50001994%201.4190517-.50001994%202.15384615%200%201.90325822%201.29087852%203.44615385%203.50001074%203.44615385z'/%3e%3c/g%3e%3c/svg%3e)
'%3e%3cpath%20d='m3.32914689%209.75289602h.7565577c.24839204-.0147988.38278051-.02457717.4031654-.0293351%201.16154089-.27110952%201.48432098-.66403845%202.18198312-1.22356092.66226899-.5311373.70308671-.69508684%201.11584772-1.12911838.30177194-.31732294.90263813-.969681%201.80259859-1.95707418.09393236-.52119243.01353812-.89615922-.24118271-1.12490037-.25472083-.22874114-.57694888-.29225148-.96668414-.19053102l-1.29419358%201.09300041'/%3e%3cpath%20d='m5.30524166%203.02854316v-1.41982357c0-.48824872.39580379-.88405251.88405251-.88405251.00231541%200%20.00463082.0000091.00694616.00002729.49321336.00387539.89099866.40479853.89099866.89802712v3.4838213'/%3e%3cpath%20d='m3.48847922%204.0467801c0-1.04613296%200-2.09226592%200-3.13839888%200-.50168509.40669612-.90838122.90838122-.90838122s.90838122.40669613.90838122.90838122v3.09161878'/%3e%3cpath%20d='m1.66457345%203.33192247c0-.57313929%200-1.14627858%200-1.71941787%200-.48645753.39435174-.88080928.88080927-.88080928.49078883%200%20.892832.3898351.90796099.88039069.01171184.37975477.02342367.75950954.03513551%201.13926431'/%3e%3cpath%20d='m3.32914689%209.75289602c-.50881236%200-1.44855803-.51409483-1.82914689-.75289602s-.87764481-.70491382-1.12324045-1.1652062c-.09169685-.17185714-.17142974-.34692425-.23919865-.52520132-.09094833-.2392401-.1375609-.49304454-.1375609-.74898872v-3.97542101c0-.45965927.37262746-.83228673.83228672-.83228673.45965927%200%20.83228673.37262746.83228673.83228673v1.46622694'/%3e%3c/g%3e%3c/svg%3e)


'%3e%3crect%20width='3'%20height='3'%20rx='1'/%3e%3crect%20width='3'%20height='3'%20y='5'%20rx='1'/%3e%3crect%20width='3'%20height='3'%20x='5'%20y='5'%20rx='1'/%3e%3crect%20width='3'%20height='3'%20x='5'%20rx='1'/%3e%3c/g%3e%3c/svg%3e)
'%3e%3cpath%20d='m7.73400827.5c.63670388%200%201.23536393.30315947%201.61216661.81639584l2.15382512%202.9336877v2.24991646c0%20.41421356-.1678932.78921356-.4393398%201.06066017s-.6464466.43933983-1.0606602.43933983h-8c-.41421356%200-.78921356-.16789322-1.06066017-.43933983s-.43933983-.64644661-.43933983-1.06066017v-2.24565304l2.15402431-2.93712235c.37675304-.51372204.97570867-.81722461%201.61277475-.81722461z'/%3e%3cpath%20d='m1.5%204h2.5v.40066689c0%20.55228475.44771525%201%201%201h2c.55228475%200%201-.44771525%201-1v-.40066689h2.5'%20stroke-linecap='square'%20stroke-linejoin='round'/%3e%3c/g%3e%3c/svg%3e)
'%3e%3cpath%20d='m-0%20590.768c0-79.756%2064.654-144.41%20144.41-144.41%2079.755%200%20144.41%2064.654%20144.41%20144.41s-64.655%20144.41-144.41%20144.41c-79.756%200-144.41-64.654-144.41-144.41z'%20fill-rule='nonzero'/%3e%3cpath%20d='m446.362%20144.41c0-79.756%2064.655-144.41%20144.41-144.41%2079.756%200%20144.41%2064.654%20144.41%20144.41%200%2079.755-64.654%20144.41-144.41%20144.41-79.755%200-144.41-64.655-144.41-144.41z'%20fill-rule='nonzero'/%3e%3cpath%20d='m656.412%20421.745c0%20129.603-105.064%20234.667-234.667%20234.667h-54.154v-108.308h54.154c69.786%200%20126.359-56.573%20126.359-126.359v-54.153h108.308z'/%3e%3c/g%3e%3c/svg%3e)
'%3e%3cpath%20d='m3.99497627%2011.7034752h1.28502373c.80346258-.1186453%201.63722519-.5287155%202.50128784-1.2302106.55236586-.448442.64615115-1.31032471%201.2671486-1.90379388.3815763-.36466134%201.09307236-.97311111%202.13448826-1.82534932.1127189-.62543092.0162458-1.07539106-.2894192-1.34988044-.305665-.27448937-.6923387-.35070178-1.160021-.22863722l-1.22879771%201.06404801c-.5953068%200-1.19610517.17148988-1.80239512.51446965s-1.01811693.75642944-1.23548093%201.240349'/%3e%3cpath%20d='m6.36629%203.71610541v-1.90347265c0-.52133166.42262281-.94395447.94395446-.94395447.0024723%200%20.0049446.00000971.00741682.00002914l.25048786.00196819c.51842153.00407345.93653765.4254878.93653765.94392533v4.3132504'/%3e%3cpath%20d='m4.18617506%204.85613613c0-1.26586871%200-2.53173742%200-3.79760612%200-.58460998.47392003-1.05853001%201.05853001-1.05853001h.06305492c.58460998%200%201.05853001.47392003%201.05853001%201.05853001v2.5883063'/%3e%3cpath%20d='m1.99748814%203.99830697c0-.68776715%200-1.3755343%200-2.06330145%200-.58374904.47322209-1.05697113%201.05697113-1.05697113h.03058346c.57190542%200%201.04039748.45426627%201.05802696%201.0258999.01436846.46589536.02873691.93179073.04310537%201.39768609'/%3e%3cpath%20d='m3.99497627%2011.7034752c-.61057483%200-1.94616461-.2597441-2.40287125-.5463056-.45670663-.2865614-.96879242-.7816526-1.26350718-1.33400347-.19206346-.35996302-.30104485-.86589333-.32694416-1.51779091-.00110723-.028069-.00166118-.05615718-.00165368-.08424801v-5.11890791c0-.55159112.44715295-.99874407.99874407-.99874407s.99874407.44715295.99874407.99874407v1.97511965'/%3e%3c/g%3e%3c/svg%3e)
'%3e%3cg%20stroke-linecap='round'%20stroke-linejoin='round'%3e%3cpath%20d='m6%201.5v-1'/%3e%3cpath%20d='m1.646447%202.353553.707106-.707106'%20transform='matrix(-1%200%200%201%204%200)'/%3e%3cpath%20d='m9.646447%202.353553.707106-.707106'/%3e%3cpath%20d='m.5%201.5v-1'%20transform='matrix(0%201%20-1%200%2012%205.5)'/%3e%3cpath%20d='m.5%201.5v-1'%20transform='matrix(0%201%20-1%200%202%205.5)'/%3e%3cpath%20d='m6%2011.5v-1'%20transform='matrix(1%200%200%20-1%200%2022)'/%3e%3cpath%20d='m1.646447%2010.353553.707106-.707106'%20transform='matrix(-1%200%200%20-1%204%2020)'/%3e%3cpath%20d='m9.646447%2010.353553.707106-.707106'%20transform='matrix(1%200%200%20-1%200%2020)'/%3e%3c/g%3e%3ccircle%20cx='6'%20cy='6'%20r='3'/%3e%3c/g%3e%3c/svg%3e)
'%3e%3cpath%20d='m.63171946%200v5.5c0%201%20.45609351%201.5%201.36828054%201.5h7'/%3e%3cpath%20d='m7%205.0735973%202%201.9809116-2%201.9454911'/%3e%3c/g%3e%3c/svg%3e)

'/%3e%3cpath%20d='m1.5.5c.40850956%200%20.75934157.11093655%201.04789137.34510605%201.00038431-.16809045%201.4313607-.34510605%201.95210863-.34510605.2876184%200%20.52880838.11765101.6970656.32797252.20218461.25273077.3029344.61771283.3029344%201.04702748%200%20.95629318-.88641439%202.09879188-2.49613008%203.46940897-1.67772949-1.46184687-2.50386992-2.55073577-2.50386992-3.46940897%200-.42931465.10074979-.79429671.30293441-1.04702748.16825721-.21032151.40944719-.32797252.69706559-.32797252z'%20transform='matrix(-0%201%20-1%20-0%2012%204)'/%3e%3cpath%20d='m1.5.5c.40850956%200%20.75934157.11093655%201.04789137.34510605%201.00038431-.16809045%201.4313607-.34510605%201.95210863-.34510605.2876184%200%20.52880838.11765101.6970656.32797252.20218461.25273077.3029344.61771283.3029344%201.04702748%200%20.95629318-.88641439%202.09879188-2.49613008%203.46940897-1.67772949-1.46184687-2.50386992-2.55073577-2.50386992-3.46940897%200-.42931465.10074979-.79429671.30293441-1.04702748.16825721-.21032151.40944719-.32797252.69706559-.32797252z'%20transform='matrix(0%201%201%20-0%20-0%204)'/%3e%3cpath%20d='m6%206.94277051v2.5c.38271262%201.66666669%201.38271262%202.49999999%203%202.49999999'/%3e%3c/g%3e%3c/svg%3e)
'/%3e%3c/svg%3e)

'%3e%3cpath%20d='m0%201.666667h3.333333'%20transform='matrix(0%201%20-1%200%203.333334%200)'/%3e%3cpath%20d='m0%201.666667h3.333333'/%3e%3c/g%3e%3cpath%20d='m7.111111%208.222222%203.333333%203.333334'/%3e%3c/g%3e%3c/g%3e%3c/svg%3e)

'/%3e%3c/svg%3e)
'%3e%3ccircle%20cx='4.5'%20cy='4.5'%20r='4.5'/%3e%3cpath%20d='m6.50122137.46836703c1.48105666.73658443%202.49877863%202.26525785%202.49877863%204.03163297s-1.01772197%203.29504854-2.49877863%204.03163297c-1.48303706-.73589006-2.50122137-2.26485667-2.50122137-4.03163297%200-1.70419294.94732892-3.18712536%202.34411129-3.95092178z'%20fill='%23000'/%3e%3ccircle%20cx='8.5'%20cy='4.5'%20r='4.5'/%3e%3c/g%3e%3c/svg%3e)
'/%3e%3c/svg%3e)


'%3e%3cpath%20d='m0%200%202.828427%202.828427'/%3e%3cpath%20d='m0%200%202.828427%202.828427'%20transform='matrix(-1%200%200%201%202.828428%200)'/%3e%3c/g%3e%3cg%20stroke-linecap='square'%3e%3cpath%20d='m8%203v7'/%3e%3cpath%20d='m2%208.5v1.5'/%3e%3c/g%3e%3c/g%3e%3c/svg%3e)
'%3e%3cpath%20stroke-linejoin='bevel'%20d='M5.673%200c1.325%201.293%202.182%203.352%202.182%205.672s-.857%204.38-2.182%205.673c-1.326-1.294-2.182-3.353-2.182-5.673%200-2.263.815-4.278%202.085-5.576z'/%3e%3ccircle%20cx='5.618'%20cy='5.618'%20r='5.618'%20stroke-linejoin='round'/%3e%3cpath%20stroke-linejoin='round'%20d='M11.127%205.455H.218'/%3e%3c/g%3e%3c/svg%3e)


'%3e%3cpath%20d='m.94974747%203.44974747h9.50000003v3h-9.50000003c-.82842713%200-1.5-.67157288-1.5-1.5%200-.82842713.67157287-1.5%201.5-1.5z'%20transform='matrix(.70710678%20.70710678%20-.70710678%20.70710678%204.949747%20-2.050252)'/%3e%3cpath%20d='m7.94974747%209.94974747%203.00000003%201.00000003-1.00000003-3.00000003z'%20fill='%23000'/%3e%3cpath%20d='m1.949747%203.949747%202-2'/%3e%3c/g%3e%3c/svg%3e)
'%3e%3crect%20width='3'%20height='3'%20x='2'%20y='2'%20stroke-linecap='square'%20rx='1'/%3e%3crect%20width='3'%20height='3'%20x='2'%20y='7'%20stroke-linecap='square'%20rx='1'/%3e%3crect%20width='3'%20height='3'%20x='2'%20y='12'%20stroke-linecap='square'%20rx='1'/%3e%3crect%20width='3'%20height='3'%20x='7'%20y='7'%20stroke-linecap='square'%20rx='1'/%3e%3crect%20width='3'%20height='3'%20x='7'%20y='12'%20stroke-linecap='square'%20rx='1'/%3e%3crect%20width='3'%20height='3'%20x='7'%20y='2'%20stroke-linecap='square'%20rx='1'/%3e%3crect%20width='12'%20height='19'%20stroke-linecap='square'%20rx='1'/%3e%3cpath%20stroke-linecap='round'%20d='M3.5%2017.5h5'/%3e%3c/g%3e%3c/svg%3e)
'%3e%3cg%20fill='%23000'%20transform='matrix(0%201%20-1%200%2010.705919%200)'%3e%3cpath%20d='m3.21420101%200h2.06354366l-.02130959%207h-2.98812649c-.50120858%200-.90751842-.40630984-.90751842-.90751843%200-.24832014.10175361-.48579383.28154626-.65707575l1.33209891-1.26904218c.1981146-.18873657.31023751-.45041026.31023751-.72403571v-.33484647c0-.18393675-.05073139-.36431009-.14661379-.52127917l-.71656606-1.17309042c-.26742442-.43780054-.12930727-1.00949833.30849328-1.27692274.14580813-.08906488.31335641-.13618913.48421473-.13618913z'/%3e%3cpath%20d='m7.93645634%200h2.06354366l-.02130959%207h-2.98812649c-.50120858%200-.90751842-.40630984-.90751842-.90751843%200-.24832014.10175361-.48579383.28154626-.65707575l1.33209891-1.26904218c.1981146-.18873657.31023751-.45041026.31023751-.72403571v-.33484647c0-.18393675-.05073139-.36431009-.14661379-.52127917l-.71656606-1.17309042c-.26742441-.43780054-.12930727-1.00949833.30849328-1.27692274.14580813-.08906488.31335641-.13618913.48421473-.13618913z'%20transform='matrix(-1%200%200%201%2014.722256%200)'/%3e%3c/g%3e%3cpath%20d='m3.5%205.205919h-3'%20stroke='%23000'%20stroke-linecap='square'%20stroke-linejoin='round'/%3e%3c/g%3e%3c/svg%3e)
'/%3e%3c/svg%3e)
'%3e%3cpath%20d='m0%200h8v7h-8z'%20stroke-linecap='square'/%3e%3cpath%20d='m3.5%207.5-3%202'%20stroke-linecap='round'/%3e%3cpath%20d='m7.5%207.5-3%202'%20stroke-linecap='round'%20transform='matrix(-1%200%200%201%2012%200)'/%3e%3cpath%20d='m.5%201.5h7'%20stroke-linecap='square'/%3e%3cpath%20d='m4%207.5v2'%20stroke-linecap='round'/%3e%3c/g%3e%3c/svg%3e)

'%3e%3cpath%20d='m5.5%209.16666667c2.02504408%200%203.66666667-1.64162259%203.66666667-3.66666667s-1.64162259-3.66666667-3.66666667-3.66666667-3.66666667%201.64162259-3.66666667%203.66666667'%20transform='matrix(-.70710678%20-.70710678%20.70710678%20-.70710678%205.5%2013.278175)'/%3e%3cpath%20d='m7.38199597.90005919%201.68154328%202.50092851-2.45449601.99168076'%20transform='matrix(.92718385%20.37460659%20-.37460659%20.92718385%201.561954%20-2.742828)'/%3e%3c/g%3e%3c/svg%3e)
'%3e%3cpath%20d='m2%202v6.5625c0%20.2416246.19187797.4375.42857143.4375h5.14285714c.23669346%200%20.42857143-.1958754.42857143-.4375v-6.5625z'/%3e%3cpath%20d='m10%201.5h-10'/%3e%3cpath%20d='m4%202h2v-1.5c0-.27614237-.14923842-.5-.33333333-.5h-1.33333334c-.18409491%200-.33333333.22385763-.33333333.5z'/%3e%3cg%20stroke-linecap='round'%20stroke-linejoin='round'%3e%3cpath%20d='m4%203.75v3.5'/%3e%3cpath%20d='m6%203.75v3.5'/%3e%3c/g%3e%3c/g%3e%3c/svg%3e)
'/%3e%3c/svg%3e)
'%3e%3cpath%20d='m1%201.906402%207%20.020001'%20transform='matrix(-1%200%200%201%209%200)'/%3e%3cpath%20d='m0%200%202%201.9809116-2%201.9454911'%20transform='matrix(-1%200%200%201%202%200)'/%3e%3cpath%20d='m7%200%202%201.9809116-2%201.9454911'/%3e%3c/g%3e%3c/svg%3e)
'/%3e%3c/svg%3e)
'%3e%3ccircle%20cx='1'%20cy='3'%20fill='%23fff'%20r='1'/%3e%3cg%20stroke='%23000'%20stroke-linejoin='round'%3e%3ccircle%20cx='1'%20cy='7'%20fill='%23000'%20r='1'%20stroke-linecap='square'/%3e%3cpath%20d='m5%207.5c0-2.48528137-2.01471863-4.5-4.5-4.5'%20stroke-linecap='round'/%3e%3cpath%20d='m8%207.5c0-4.14213562-3.35786438-7.5-7.5-7.5'%20stroke-linecap='round'/%3e%3c/g%3e%3c/g%3e%3c/svg%3e)
'%3e%3ccircle%20cx='3.5'%20cy='3.5'%20r='3.5'%20stroke-linecap='square'/%3e%3cpath%20stroke-linecap='round'%20d='M6.5%206.5l3%203'/%3e%3c/g%3e%3c/svg%3e)


'%3e%3crect%20height='11'%20rx='2'%20stroke='%23000'%20stroke-linecap='square'%20stroke-linejoin='round'%20width='11'/%3e%3cpath%20d='m7%200h3c.5522847%200%201%20.44771525%201%201v9c0%20.5522847-.4477153%201-1%201h-3z'%20fill='%23000'/%3e%3c/g%3e%3c/svg%3e)
'%3e%3cpath%20d='m1.66852629%202.64939417c-1.02277496.89671348-1.66852629%202.21297795-1.66852629%203.68006572%200%202.70200237%202.1904057%204.89240811%204.89240807%204.89240811s4.89240808-2.19040574%204.89240808-4.89240811c0-1.45820211-.63795282-2.76740236-1.64998402-3.66372632'/%3e%3cpath%20d='m4.892408.5v5'/%3e%3c/g%3e%3c/svg%3e)
'%3e%3cpath%20d='m4.5%208.5v-5'%20stroke-linecap='round'/%3e%3cg%20fill='%23000'%20stroke-linecap='square'%3e%3cpath%20d='m6.57056285%203.81412325c.76706216%200%201.6153397-.40152509%202.54483263-1.20457526-.91502357-.79525351-1.75606644-1.19288027-2.52312859-1.19288027s-1.59268595.39762676-2.47687141%201.19288027c.8697161.80305017%201.68810522%201.20457526%202.45516737%201.20457526z'%20transform='matrix(.70710678%20-.70710678%20.70710678%20.70710678%20.088241%205.443822)'/%3e%3cpath%20d='m2.57056285%203.81412325c.76706216%200%201.6153397-.40152509%202.54483263-1.20457526-.91502357-.79525351-1.75606644-1.19288027-2.52312859-1.19288027s-1.59268595.39762676-2.4768714%201.19288027c.86971609.80305017%201.68810521%201.20457526%202.45516736%201.20457526z'%20transform='matrix(-.70710678%20-.70710678%20-.70710678%20.70710678%206.314122%202.615395)'/%3e%3c/g%3e%3c/g%3e%3c/svg%3e)
'%3e%3cpath%20d='m4.1952172.2440215%202.67984379%203.34980474c.08625239.10781548.06877204.26513858-.03904344.35139096-.04432826.03546261-.09940589.0547828-.15617376.0547828h-5.35968758c-.13807119%200-.25-.11192881-.25-.25%200-.05676787.01932019-.1118455.0547828-.15617376l2.67984379-3.34980474c.08625238-.10781548.24357548-.12529582.35139096-.03904344.01441618.01153294.0275105.02462727.03904344.03904344z'%20fill='%23000'%20stroke-linecap='square'/%3e%3cpath%20d='m5.06666667%204%202.64158333%203.60215908c.08165028.1113413.05758096.26779189-.05376034.34944217-.04287924.03144478-.09466758.04839875-.14784091.04839875h-7.0132975c-.13807118%200-.25-.11192881-.25-.25%200-.05317333.01695398-.10496167.04839875-.14784092l2.64158333-3.60215908z'%20fill='%23000'%20stroke-linecap='square'/%3e%3cpath%20d='m4%207v3'%20stroke-linecap='round'/%3e%3c/g%3e%3c/svg%3e)
'/%3e%3c/svg%3e)


'%3e%3cpath%20d='m.454545.454545v9.09091'/%3e%3cpath%20d='m.909091%209.545455h9.090909'/%3e%3cpath%20d='m1.81818182%207.72727273%202.72727273-3.63636364%202.72727272%201.36363636%202.72727273-3.63636363'/%3e%3c/g%3e%3c/svg%3e)
'%3e%3cpath%20d='m3.5%200h4c1.93299662%200%203.5%201.56700338%203.5%203.5v3.17636875c-.4576643%201.02904469-1.16674886%201.92539035-2.12725376%202.68903699-.9605049.76364666-2.0641562%201.30851136-3.31095391%201.63459426h-2.06179233c-1.93299662%200-3.5-1.56700338-3.5-3.5v-4c0-1.93299662%201.56700338-3.5%203.5-3.5z'%20stroke-linecap='square'/%3e%3cpath%20d='m5.5%2010.6468254c0-.5040695%200-1.08328438%200-1.73764475%200-.98154054%201.19221416-2.30918065%202.62550241-2.30918065h2.62550239'/%3e%3c/g%3e%3c/svg%3e)


'%3e%3crect%20height='12'%20rx='3'%20width='12'/%3e%3ccircle%20cx='8'%20cy='4'%20r='2'/%3e%3cpath%20d='m4.66959966%206.27135946%202.13915047%203.42264075c.05854207.09366731.03006743.21705738-.06359987.27559945-.03178632.01986645-.06851585.03040034-.10599979.03040034h-4.27830094c-.11045695%200-.2-.08954305-.2-.2%200-.03748395.01053389-.07421347.03040034-.10599979l2.13915047-3.42264075c.05854206-.09366731.18193214-.12214194.27559945-.06359987.02575383.01609614.04750373.03784604.06359987.06359987z'/%3e%3c/g%3e%3c/svg%3e)
'%3e%3cpath%20d='m10.1990742%2010h-8.9990742c-.6627417%200-1.2-.44771525-1.2-1v-8c0-.55228475.5372583-1%201.2-1h1.93506421l1.38185942%201.09489234h6.28307637c.6627417%200%201.2.44771525%201.2%201v1.90510766'/%3e%3cpath%20d='m2.85663034%204h9.69559236c.5522848%200%201%20.44771525%201%201%200%20.12095125-.0219423.2408992-.0647612.3540175l-1.5141267%204c-.1471697.3887911-.5195256.6459825-.9352388.6459825h-9.61682287c-.55228475%200-1-.44771525-1-1%200-.1151274.01988039-.2293902.05876491-.33775214l1.43535721-4c.14255237-.39725965.51917299-.66224786.94123509-.66224786z'/%3e%3c/g%3e%3c/svg%3e)
'%3e%3ccircle%20cx='6'%20cy='6'%20r='6'%20stroke-linecap='square'/%3e%3cpath%20d='m8.4%206.62767337h-2.4v-3.62767337'%20stroke-linecap='round'/%3e%3c/g%3e%3c/svg%3e)
'%3e%3ccircle%20cx='6'%20cy='6'%20r='3.5'%20stroke='%23000'/%3e%3cg%20fill='%23000'%3e%3cg%3e%3ccircle%20cx='11.5'%20cy='6'%20r='1'/%3e%3ccircle%20cx='.5'%20cy='6'%20r='1'/%3e%3c/g%3e%3cg%20transform='matrix(0%20-1%201%200%205.5%2012)'%3e%3ccircle%20cx='11.5'%20cy='.5'%20r='1'/%3e%3ccircle%20cx='.5'%20cy='.5'%20r='1'/%3e%3c/g%3e%3cg%20transform='matrix(.70710678%20-.70710678%20.70710678%20.70710678%201.403806%209.889087)'%3e%3ccircle%20cx='11.5'%20cy='.5'%20r='1'/%3e%3ccircle%20cx='.5'%20cy='.5'%20r='1'/%3e%3c/g%3e%3cg%20transform='matrix(-.70710678%20-.70710678%20.70710678%20-.70710678%209.889087%2010.596194)'%3e%3ccircle%20cx='11.5'%20cy='.5'%20r='1'/%3e%3ccircle%20cx='.5'%20cy='.5'%20r='1'/%3e%3c/g%3e%3c/g%3e%3c/g%3e%3c/svg%3e)

'%3e%3cpath%20d='m5.5%209.16666667c2.02504408%200%203.66666667-1.64162259%203.66666667-3.66666667s-1.64162259-3.66666667-3.66666667-3.66666667-3.66666667%201.64162259-3.66666667%203.66666667'%20transform='matrix(-.70710678%20-.70710678%20.70710678%20-.70710678%205.5%2013.278175)'/%3e%3cpath%20d='m7.38199597.90005919%201.68154328%202.50092851-2.45449601.99168076'%20transform='matrix(.92718385%20.37460659%20-.37460659%20.92718385%201.561954%20-2.742828)'/%3e%3c/g%3e%3c/svg%3e)

'%3e%3cpath%20d='m5.5%209.16666667c2.5313051%200%205.5-3.07829276%205.5-4.58333334s-2.9686949-4.58333333-5.5-4.58333333-5.5%203.06404559-5.5%204.58333333c0%201.51928775%202.9686949%204.58333334%205.5%204.58333334z'/%3e%3cpath%20d='m5.5%205c1.81818182%200%203.48484848-.27777778%205-.83333333-1.79920903-2.77777778-3.46587569-4.16666667-5-4.16666667-1.5341243%200-3.20079097%201.38888889-5%204.16666667%201.51515152.55555555%203.18181818.83333333%205%20.83333333z'%20fill='%23000'/%3e%3ccircle%20cx='5.5'%20cy='4.5'%20r='2.5'/%3e%3cpath%20d='m6.36695623%206.74143801c.81451493%200%201.25015286-.91483479%201.44118777-1.37071901%200-.81451492-.51881935-1.370719-1.33333427-1.370719s-1.47480973.66029481-1.47480973%201.47480973.55244131%201.26662828%201.36695623%201.26662828z'%20fill='%23000'/%3e%3c/g%3e%3c/svg%3e)
'%20stroke='%23000'%20fill='none'%20fill-rule='evenodd'%20stroke-linecap='square'%20stroke-linejoin='round'%3e%3cpath%20d='M5.5%209.167c2.531%200%205.5-3.079%205.5-4.584C11%203.078%208.031%200%205.5%200S0%203.064%200%204.583c0%201.52%202.969%204.584%205.5%204.584z'/%3e%3ccircle%20cx='5.5'%20cy='4.5'%20r='2.5'/%3e%3cpath%20d='M6.367%206.741c.814%200%201.25-.914%201.441-1.37C7.808%204.556%207.29%204%206.475%204%205.66%204%205%204.66%205%205.475c0%20.814.552%201.266%201.367%201.266z'%20fill='%23000'/%3e%3c/g%3e%3c/svg%3e)